
Dear Strivers,
August is here, and that means it’s time to catch up on our July 2024 update. However, before we dive into the details, we’ve got some exciting changes and a brand-new feature that’s just been added. Curious to see what’s new? Read on for all the updates!
Changes
1. Repeat Selection Removed in WA Personal and WA API Broadcast
To make broadcasting easier, we’ve removed the Repeat selection in WA Personal Broadcast and WA API Broadcast. 📣
This change simplifies the broadcast crafting process, letting you create broadcasts without extra steps. Our goal is to improve our platform and streamline your broadcasting experience.
New Feature
1. Introducing WA Personal Blaster Module 📢
We’ve added a new feature called “WA Personal Blaster.” With this, you can easily broadcast messages to your contacts by adding them to a CSV template and attaching it as the recipient list.
This allows you to easily broadcast out the message to your specific recipients without adding them to the Contact module first. 🚀
Below is a sneak peak of our WA Personal Blast:

- Template Detail
The template you download will have editable headers for merge fields (Column B onwards).
Note: Do not edit or move the header in Column A, as it is meant for the Contact Number.

Enhancements
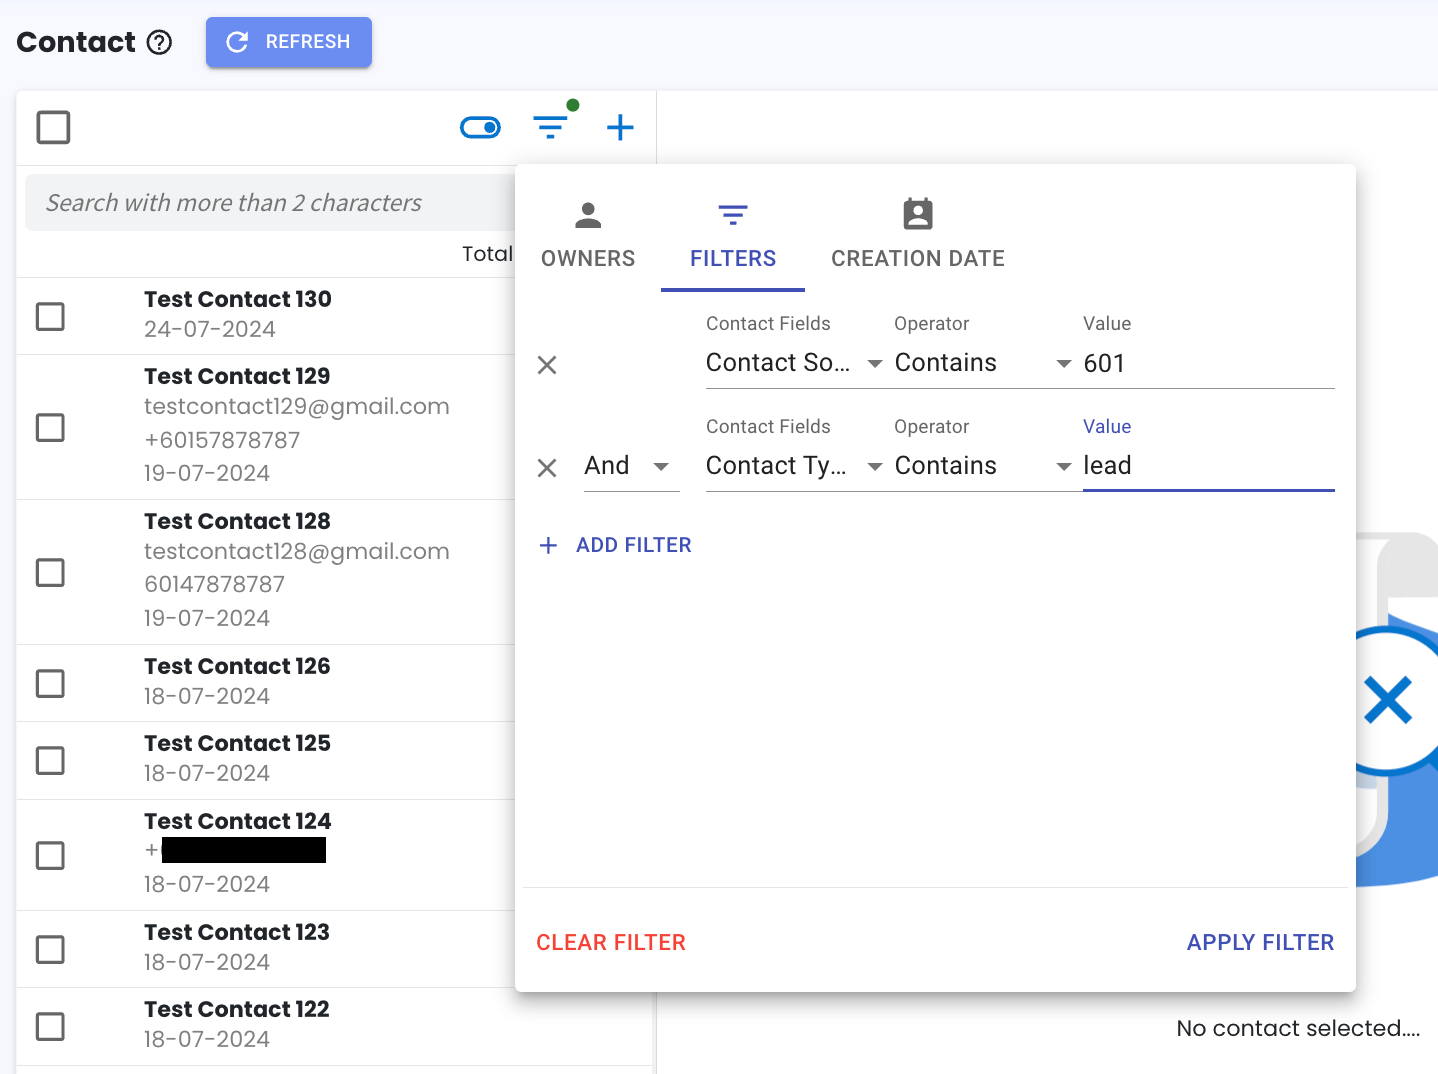
1. Enhanced Contact Filtering 🗂️
You can now easily filter contacts by multiple fields at once. 🔍
Click on “Add Filter” to include additional fields and choose between “And” or “Or.”
- And: Displays contacts that match all the selected fields.
- Or: Shows contacts that match any of the selected fields.
After selecting your fields and entering the values, click “Apply Filter” to filter the contacts.
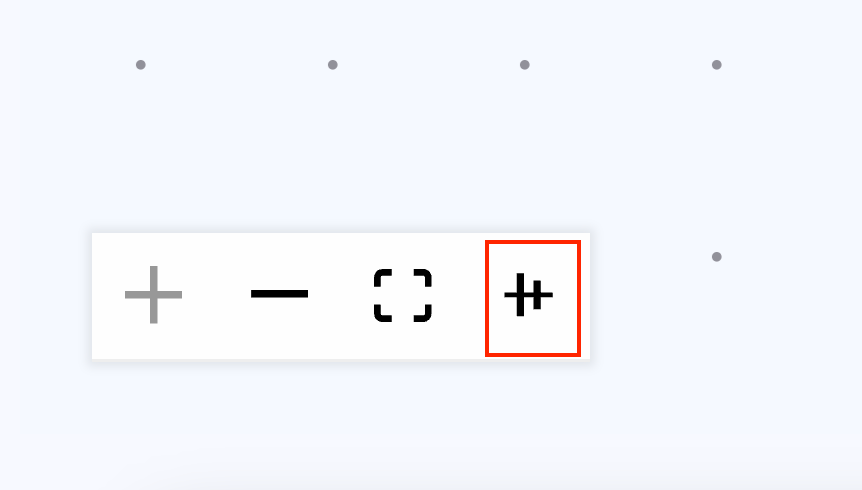
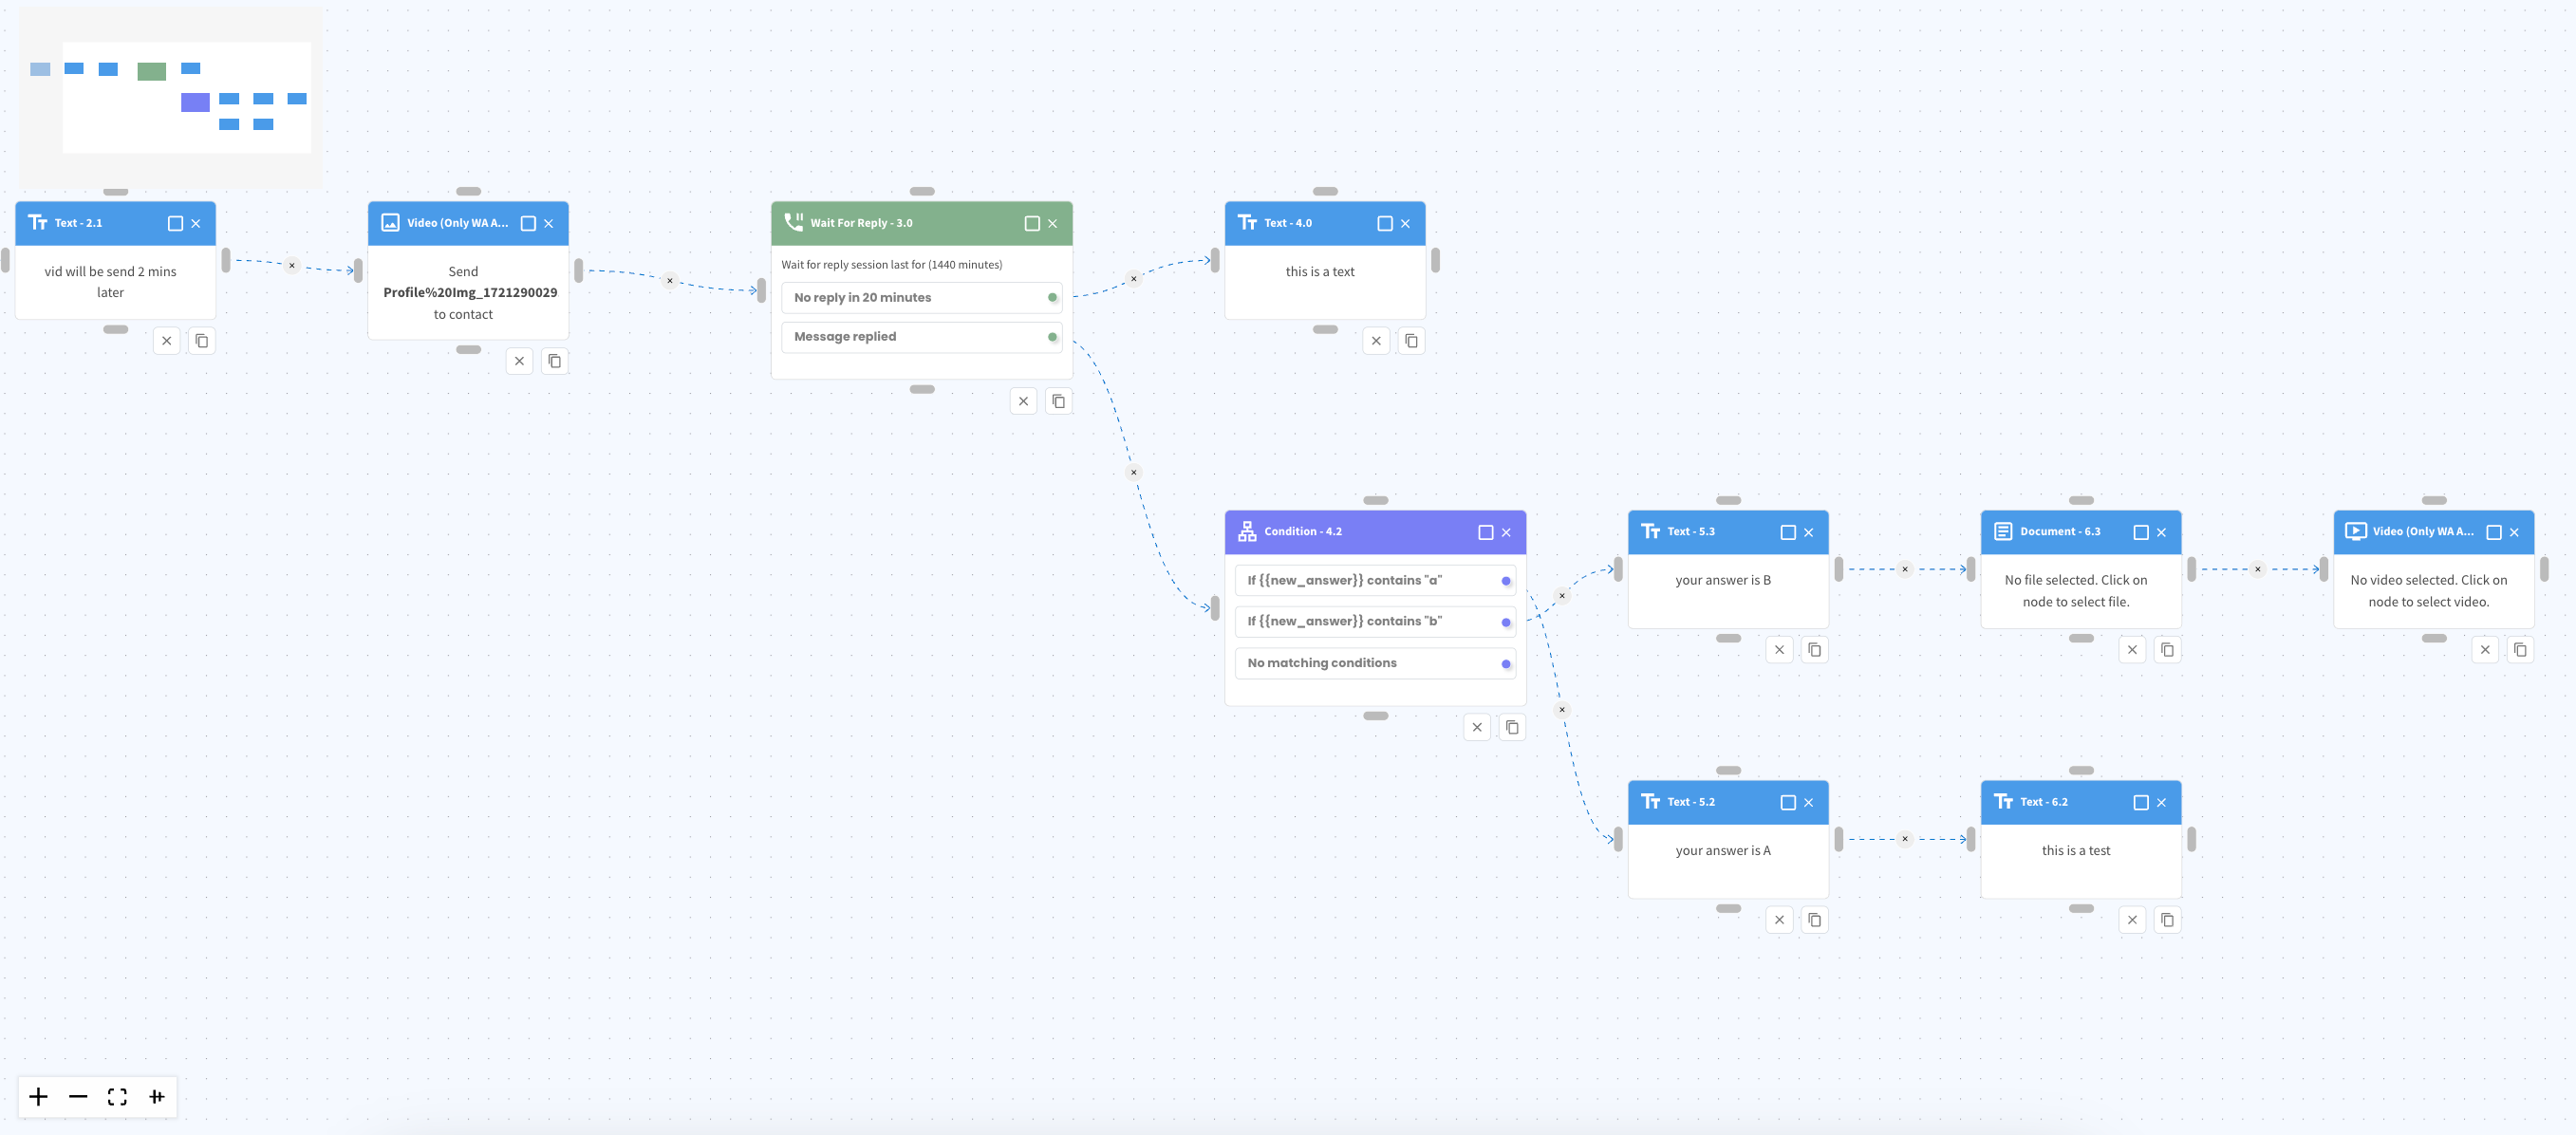
2. Flowbuilder auto align nodes
You can now easily organize your Flowbuilder nodes layout with the new auto-align feature! 🎨
Simply click on the auto-align icon (found on the right of the fit view) in the bottom left corner of the Flowbuilder. This will automatically adjust all your nodes, giving you a tidy and more organized appearance.
Note: Remember to save your Flowbuilder setup to keep the changes from the auto-align.
Here’s what the auto-align icon looks like:
Here’s an example of how your nodes will look after being auto-aligned:
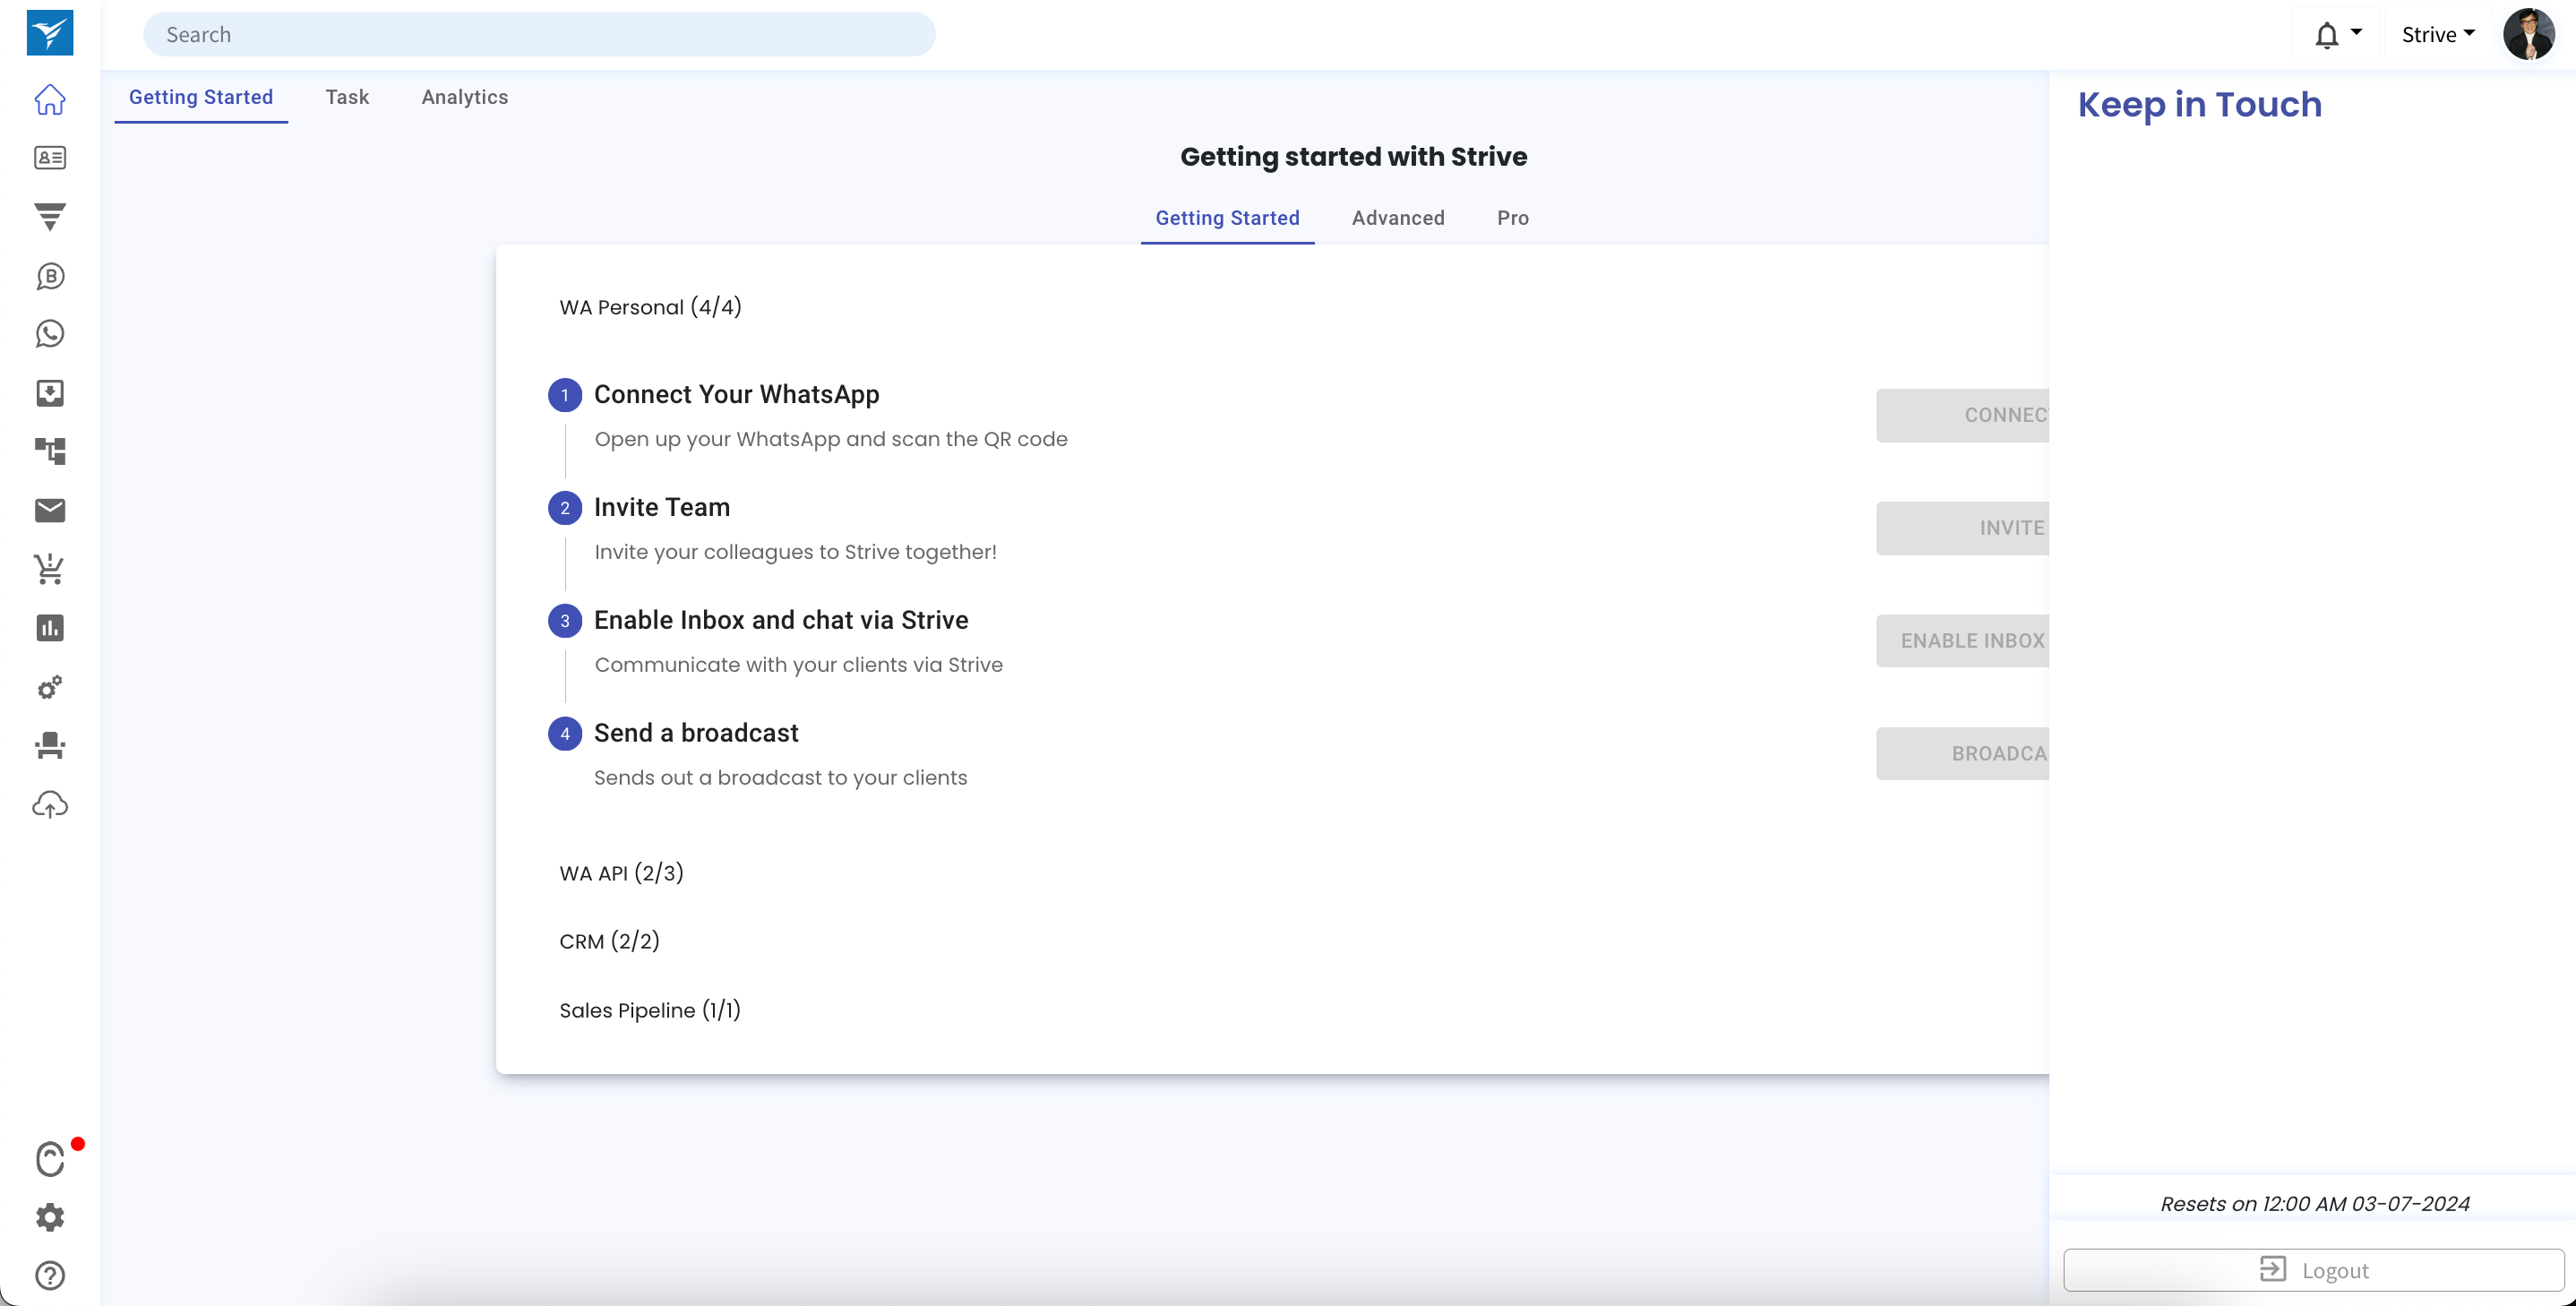
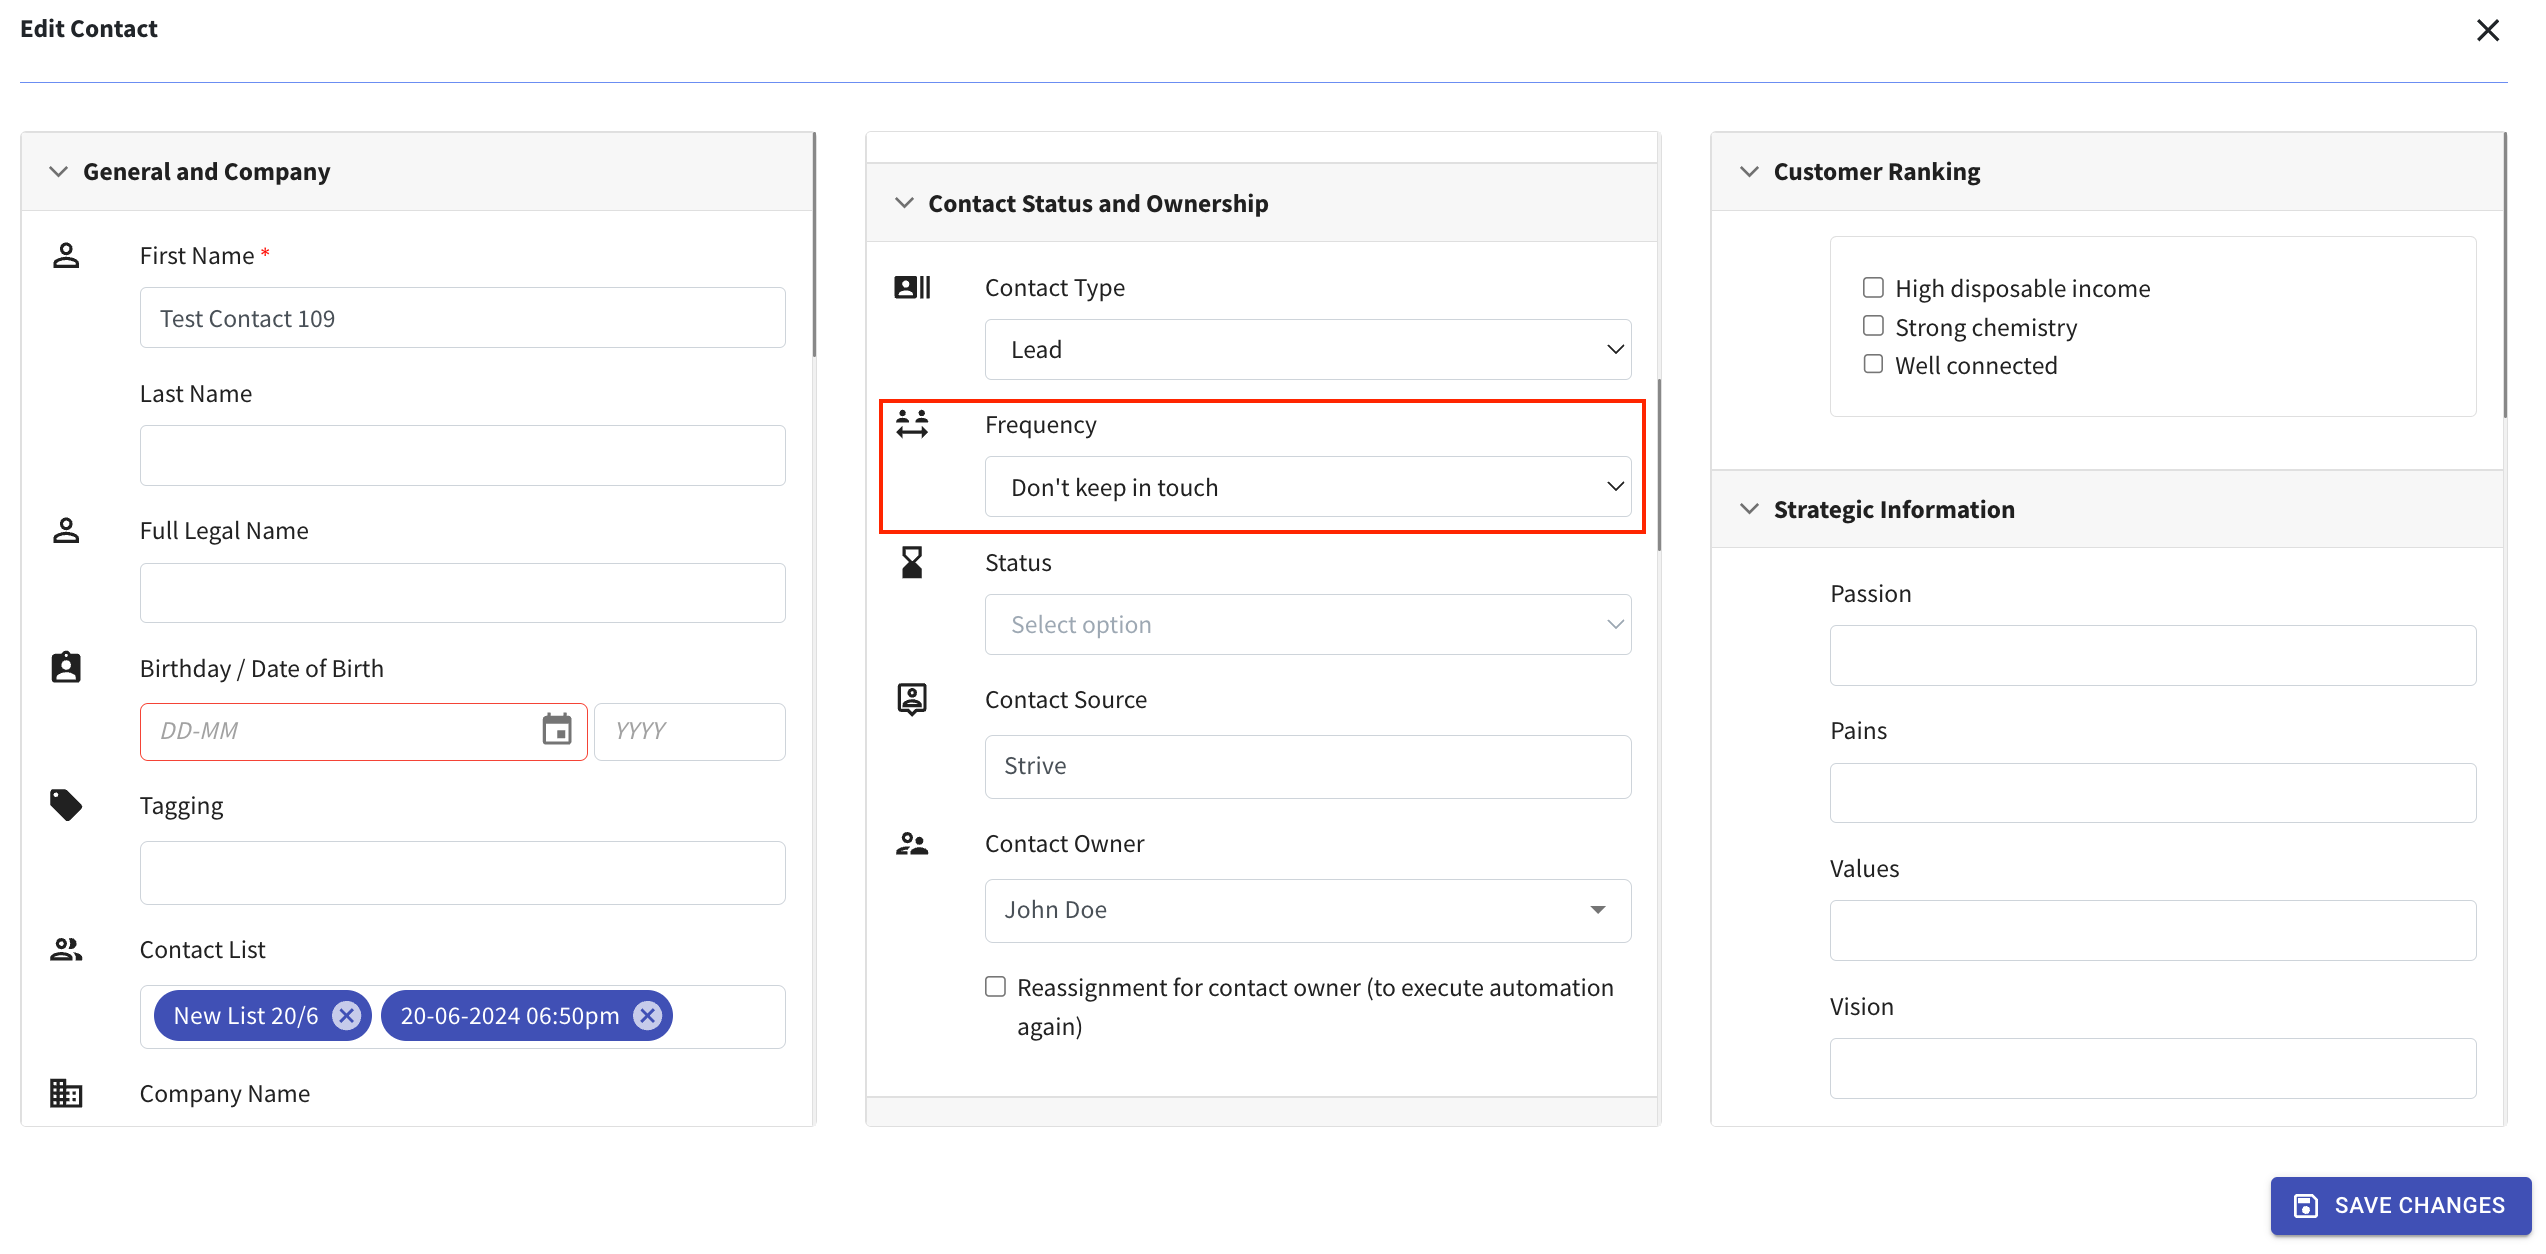
3. Keep in Touch (Formerly Action Plan) 🗓️
We’ve updated the Action Plan feature to be called Keep in Touch.
The functionality remains the same: you can track when to reach out to your contacts. Just click on your avatar at the top right to view your Keep in Touch items.
How to Configure:
- Click on “Edit Contact.”
- Scroll down to the “Contact Status and Ownership” section in the middle column.
- In the “Frequency” field, select how often you want to keep in touch with the contact from the dropdown menu.
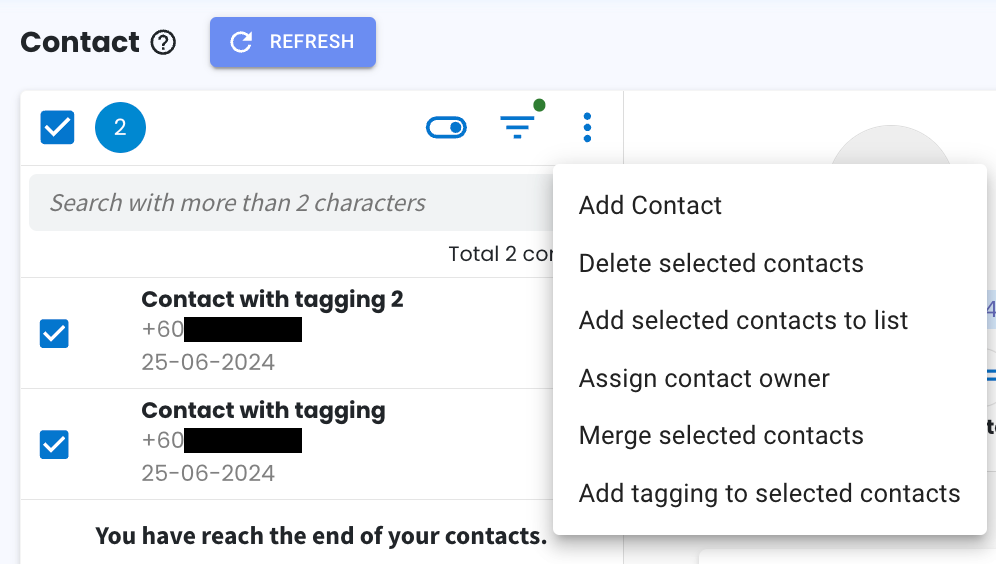
4. Easily Add Tagging to Multiple Contacts in List View 🏷️
You can now add tags to multiple contacts directly from the Contact list view. 🌟
Here are the steps:
- Select on the boxes of the contacts.
- Click the three dots to the right of the Filter icon.
- Select “Add tagging to selected contacts”.
- Choose an existing tag or enter a new tag name.
- Click “Add Tagging”.
This makes it simple to manage your contacts by grouping them with tags.
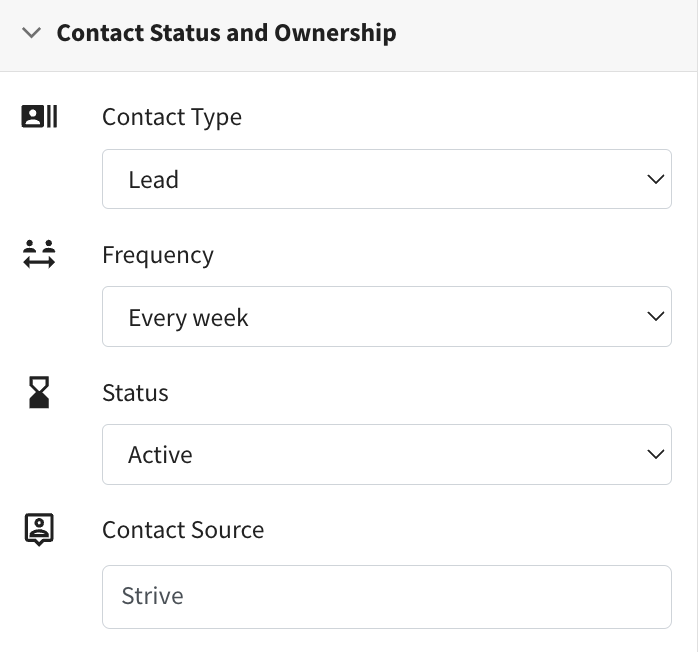
5. Channel Identification in Contact Source 📞
Contacts created automatically when they message in now show their channel source in the Contact Source field. 🌟
If you have enabled the auto-create contact in your inbox or WA Personal Setup, when a new contact messages in, you’ll see the channel ID along with their WA Personal phone number, WA API phone number, or Facebook page name in the Contact Source field.
This makes it easier to track your contacts by showing the exact source of each new contact.
Note: This change applies to new contacts moving forward. Existing contacts will remain unaffected by this update.
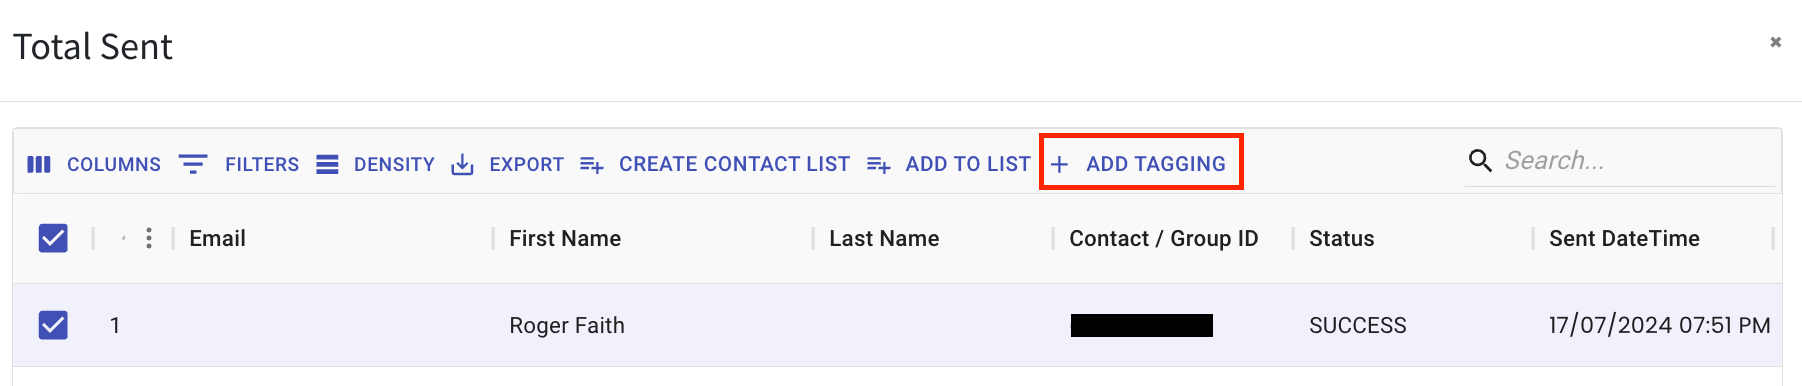
6. Add Tags to Contacts Easily from WA Personal Stats 📊
You can now quickly add tags to your contacts based on WA Personal Stats, whether you’re looking at total recipients, total sent messages, or total failed messages. This feature makes organizing your contacts simpler and more efficient.
Here’s how to add the tags:
- Double-click on the WA Personal stats you want to use (total recipient, total sent, or total failed).
- Check the box next to the “No.” column to select all contacts.
- Click on “Add Tagging.”
- Choose an existing tag(s) or click “Create New Tag” to make a new one, then enter the tag name.
- Click “Add” to apply the tag.
Now, managing your contacts is even easier with this new tagging feature! 🌟
7. Easily Add Contact in Table View 📝
Now you can create contact directly from the table view. 📋✨
Here’s how it works:
- Click on “Add Contact.”
- Fill in the contact details.
- Click “Add Contact” again to create the contact.
This allows you to manage your contacts more efficiently without switching back to List view.

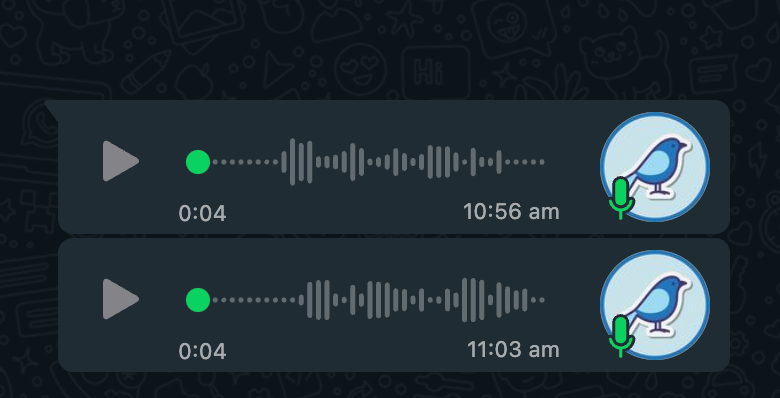
8. WA Personal Outgoing Voice Messages Now Sent as Voice Notes 🎵
Voice messages sent through Strive are now delivered as voice notes. 📱
When you click the microphone icon to record and send a message to your contact, it will be received as a voice note instead of an audio message.
This change makes it easier for your contacts to listen to and manage your messages.
Note: This update applies only to voice messages sent via the WA Personal channel only.

Sample of how the voice note looks:
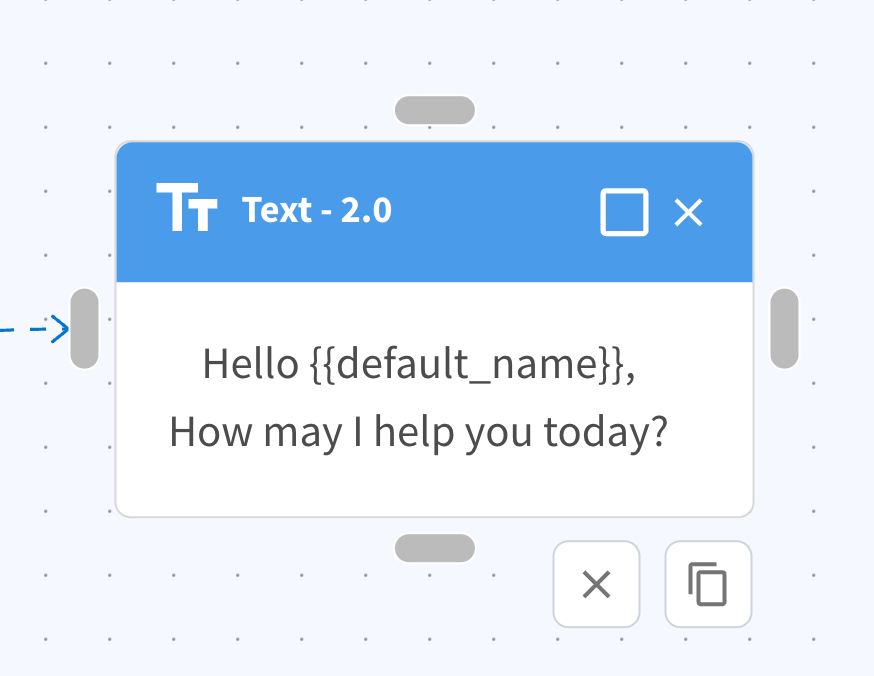
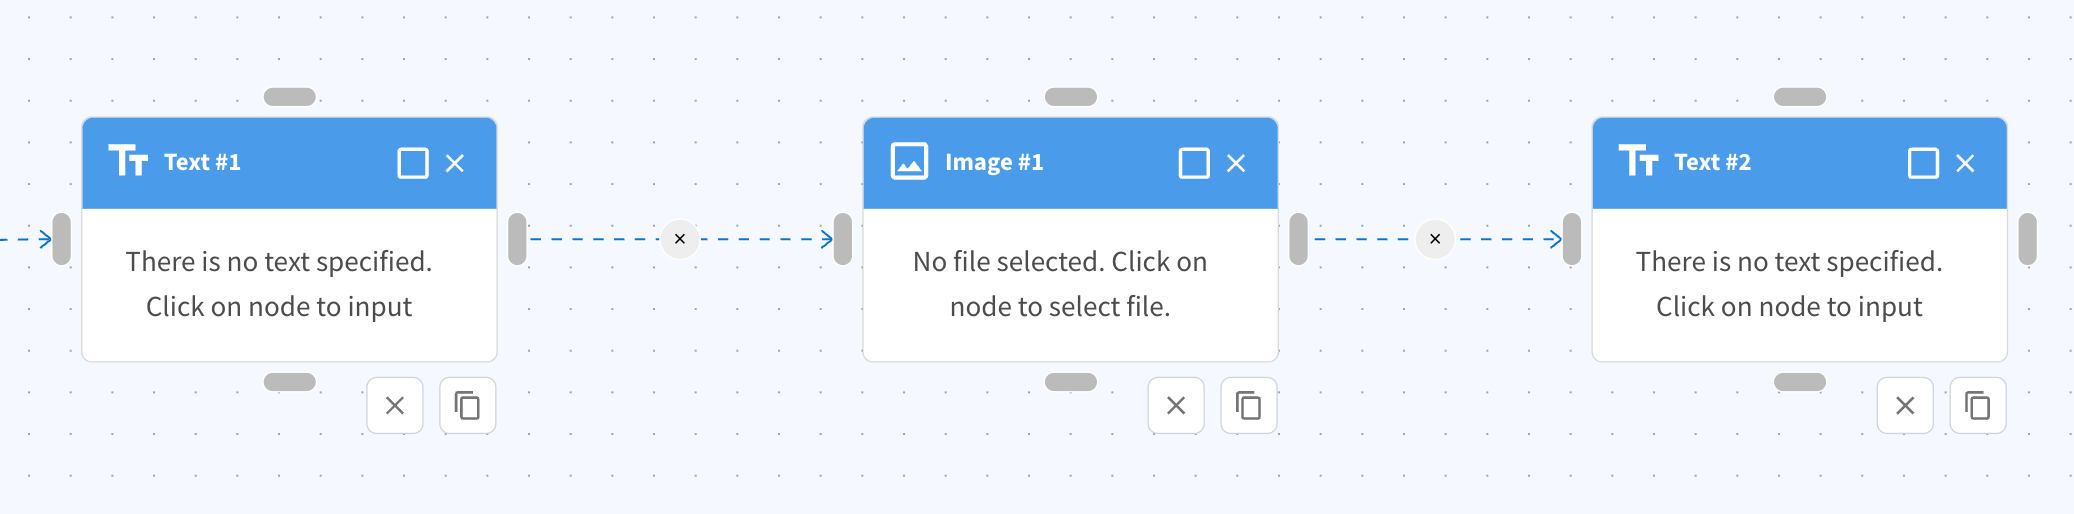
9. Easily Duplicate or Delete Flowbuilder Nodes 🛠️
We’ve made it simpler to manage your flowbuilder nodes with two new features added below each node.
You’ll now see two icons:
- The X icon lets you delete the node if you no longer need it. ❌
- The paper icon allows you to duplicate the node, making it easy to reuse the node without needing to drag and drop to create a new node. 📄
With these new icons, you can easily duplicate or remove nodes as needed.
10. Filter Inbox Analytics by Channel 📊
You can now filter your inbox analytics to show data specific to the chosen channel.
Just select the channel you want, and the analytics will update to reflect data from that channel.
This makes it easier to focus on the performance of individual channels and get insights tailored to your needs. 🎉

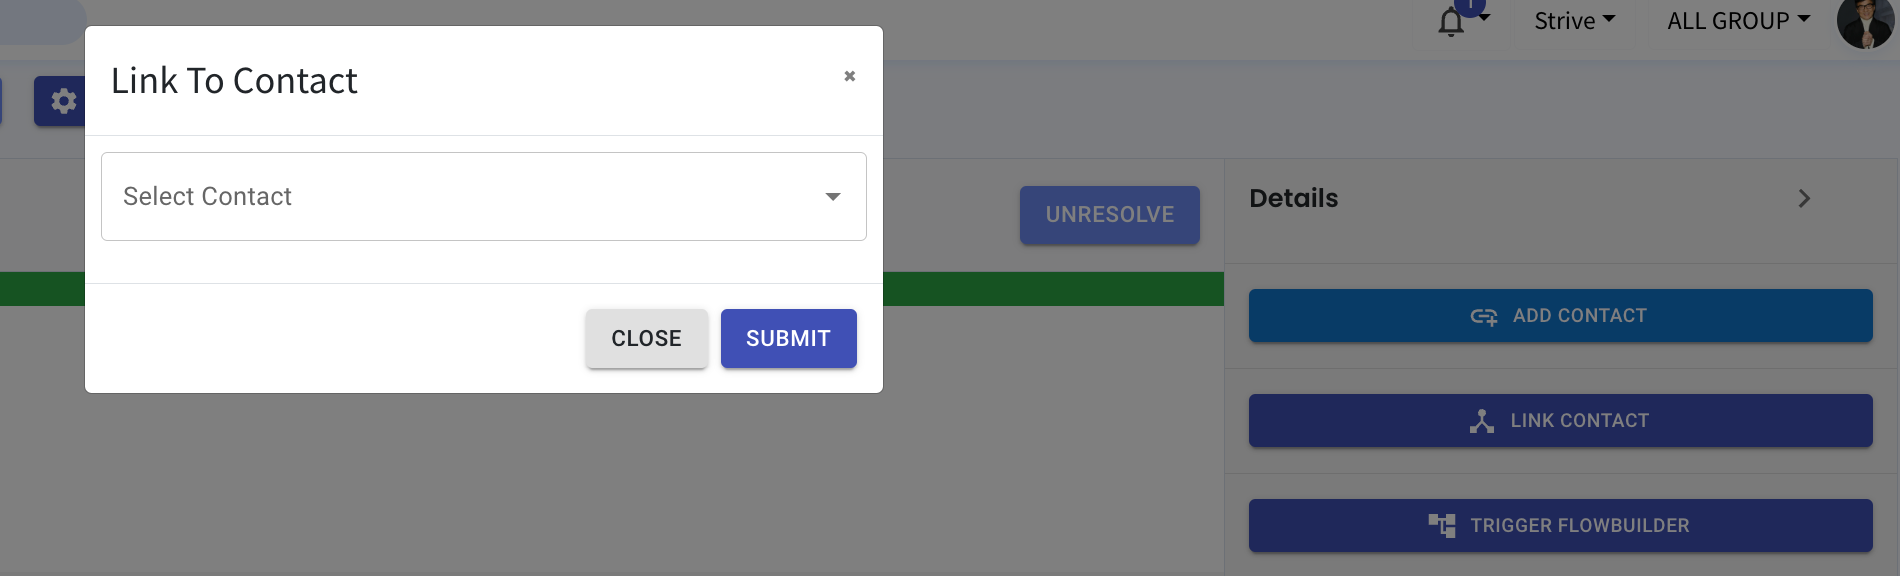
11. Easily Link Contact to Inbox Ticket 📎
Now, linking a contact to an Inbox ticket is easier!
Just type in the contact’s phone number, and any matching contacts will pop up. Simply click on the contact and hit “Submit” to link it to the ticket.
12. Flowbuilder Node Naming Simplified with Numbers 🔢
Now, when you add a new node and select an action or use a template, the node will display a number like #1, #2, and so on. This makes it easy to identify and organize your nodes.
For example, if you add a “Text” action, it might show as “Text #1”. The numbering allows you to easily identify the node.
Note: You can still edit the node names as needed.
13. Pabbly Trigger “Deal Reached Deal Won Stage” now includes Product Custom Fields 🎉
The Pabbly trigger “Deal Reached Deal Won Stage” now captures product custom fields in the webhook response.
This means when the deal is moved to the deal won stage, you’ll be able retrieve information about the linked product. These information can then be used in the other Pabbly actions, enhancing your workflow automation capabilities. 🌟
14. Inbox Ticket ID Reset 🎟️
We’ve reset the Inbox ticket ID numbers! 🔄
Now, you’ll notice that the ticket IDs are smaller and easier to manage. This change aims to improve your experience by simplifying the identification of tickets.
That brings us to the end of our July 2024 update. Stay tuned for more exciting updates coming your way!