Strive May 2026 Updates 🚀
May 2026 Update
Dear Strivers,
As we step into June, here’s a quick recap of what we released in May 2026. We hope everyone had a productive and meaningful month. Over the past few weeks, we’ve rolled out several enhancements designed to improve your daily experience and make the platform even more seamless and efficient to use. Read on to explore what’s new.
____________________________________________________________________________
Enhancements
1. AI Assist in Inbox Chat 🤖✨
What's New:
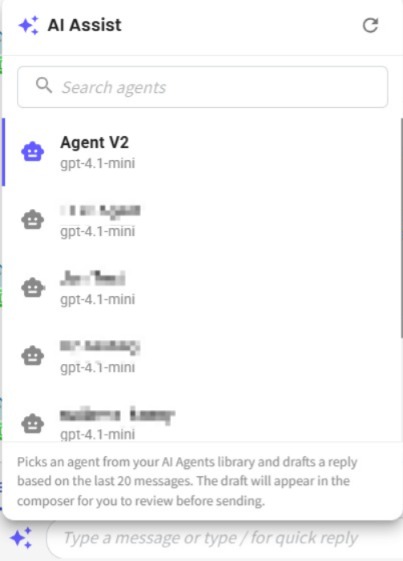
We've introduced AI Assist inside the Inbox chat composer to help you draft replies faster and smarter 🚀
What it means to you:
You can now generate AI-powered reply drafts directly in your inbox using your selected AI Agent 🌟
With AI Assist, you can:
✅ Select an AI Agent from your AI Agent library
✅ Generate replies based on the last 20 messages
✅ Speed up customer response time
✅ Maintain consistent and accurate communication
✅ Review and edit the AI-generated draft before sending 📝
How you can go about it:
Navigate to the Flowbuilder Module on the left sidebar.
Click on Agent then create your AI Agent.
Then go to the Inbox Module. Click on the AI Assist icon in the chat composer.
Pick your AI agent. The system will analyze the last 20 messages and generate a reply draft.
The draft will appear in the composer for you to review before sending 💬
2. AI Agent Enhancement 🚀
What's New:
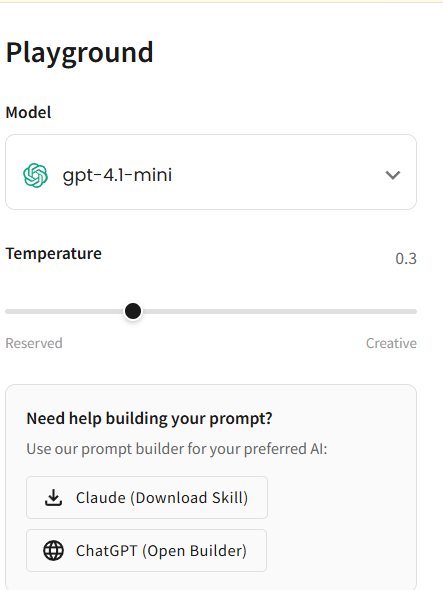
We have enhanced the Agent V1 system to include a Skills.md file for improved self-serve capabilities. A new CustomGPT is now available for ChatGPT users to generate their own prompts. 🎯✨
What it means to you:
You can now easily create and customize your own AI agent prompts without coding. This gives you more control over how the agent responds and operates. 🎉💡
With this enhancement, you can:
✅ Access and manage Skills.md for your agent
✅ Generate prompts using CustomGPT
✅ Customize agent behavior more easily
✅ Improve self-serve setup experience
✅ Refine prompts for better AI responses 🚀
How you can go about it:
Hover over the left-side menu and navigate to Flowbuilder.
Click on Agent and select the Agent you want.
Access the Skills.md file and use CustomGPT to generate and refine your prompts ✨
3. Shift-Highlight & Copy-Paste Across Flows 🔀
What's New:
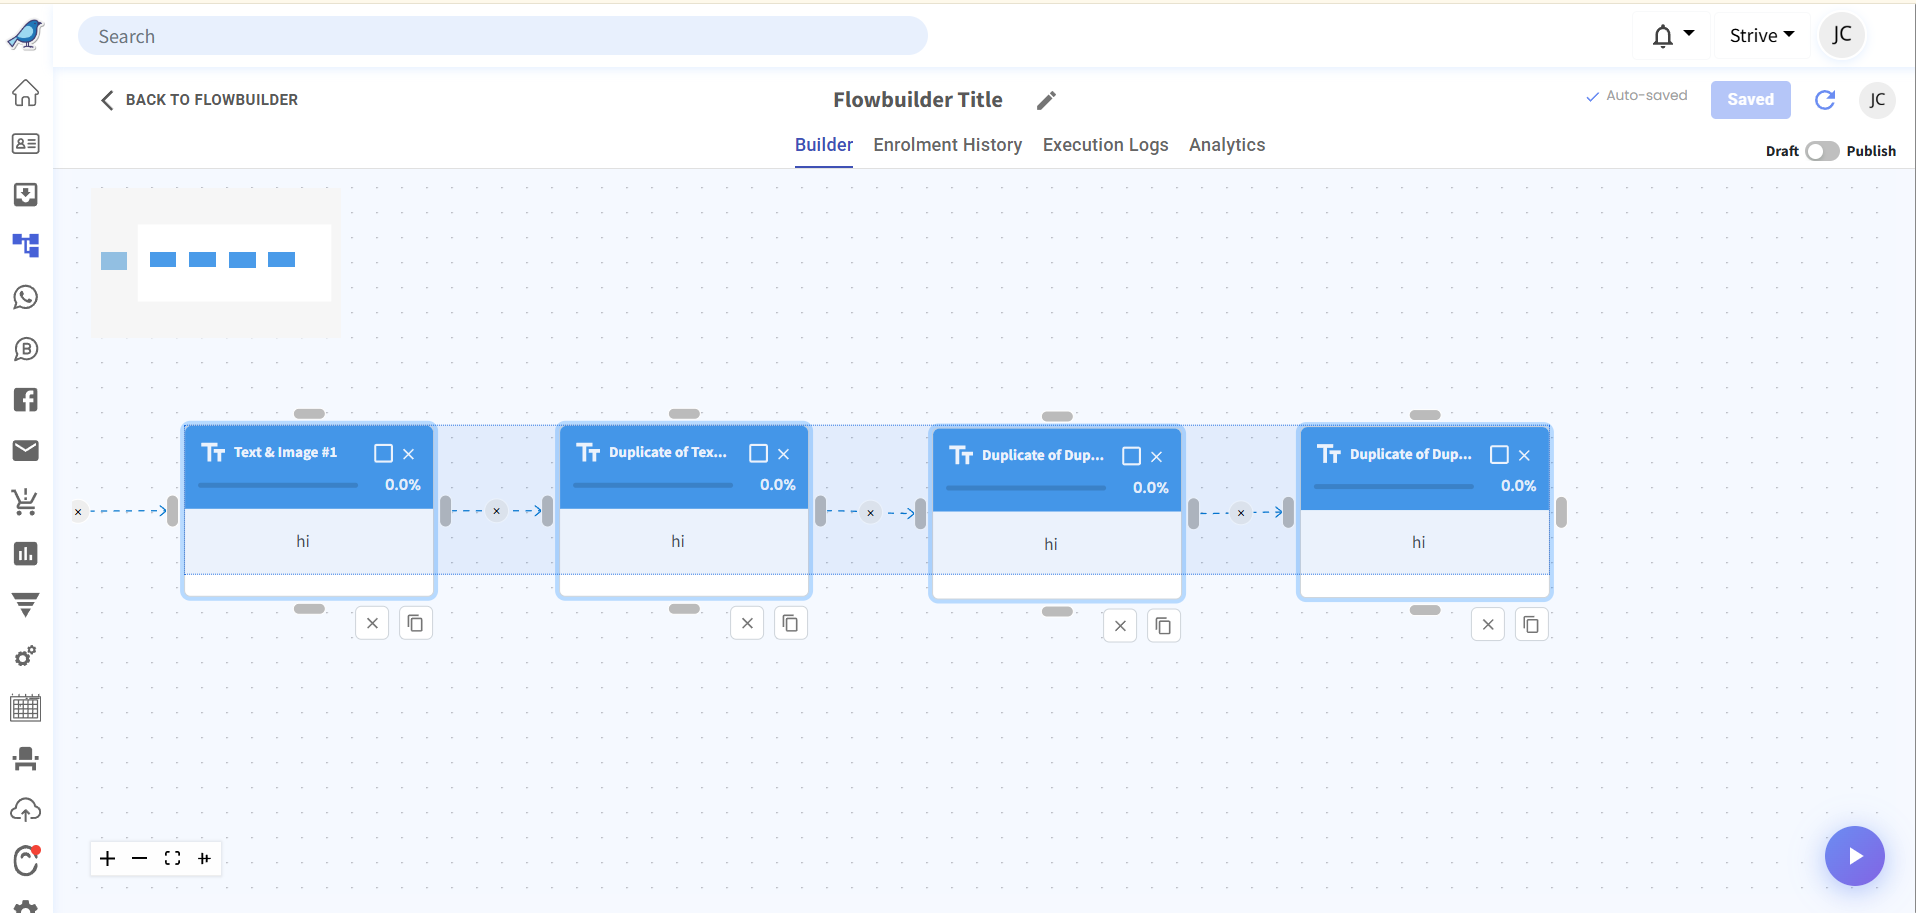
You can now select multiple nodes in Flow Builder using the Shift key and copy/paste them into another flow 🚀
What it means to you:
Reusing flow structures just got easier. Build once, duplicate across flows, and save time on repetitive setup 💪⚡
How you can go about it:
1. Hold Shift and highlight on the nodes you want to copy 🖱️
2. Press Ctrl+C (Cmd+C on Mac) to copy the selected nodes 📋
3. Open the target flow and press Ctrl+V (Cmd+V on Mac) to paste them 🎯
4. Flows History Now in Inbox 🚀
What's New:
You can now view a contact's Flow execution history directly from the Inbox module 🚀
What it means to you:
No more switching to Flowbuilders to check enrollment history. Troubleshoot faster and stay focused on your conversations 🕒
How you can go about it:
Open the contact chat in Inbox.
Scroll down the right column.
Click the "Flows History" section to see all past executions.
Click on the flow to view more details like which steps has been executed.
Get instant access without leaving your chat ✅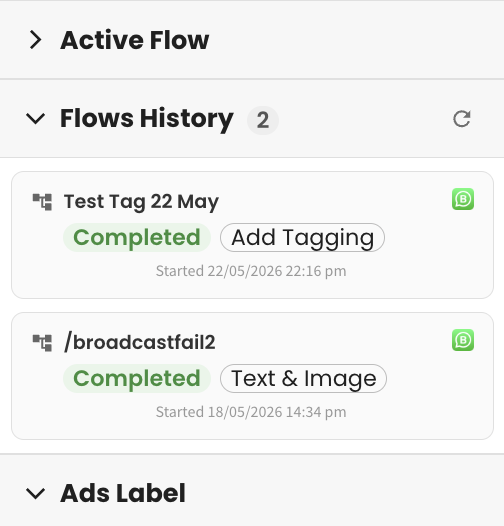
5. Inbox Report Module 📊
What's New:
We've enhanced the Report Module with Inbox Report functionality 📈
What it means to you:
You can now generate inbox reports to track key performance metrics directly from your dashboard 🌟
With Inbox Report, you can:
✅ Track New Unique Tickets
✅ Monitor New Unique Contacts
✅ View Ad Opt-In Contacts
✅ Analyze inbox activity within a selected date range
✅ Get clearer insights into customer engagement and support volume 🚀
How you can go about it:
1. Navigate to the Report Module, then click on Inbox Report
2. Select your desired date range.
3. Click Generate Report.
You will then be able to view and track your metrics including New Unique Tickets, New Unique Contacts, and Ad Opt-In Contacts 🔔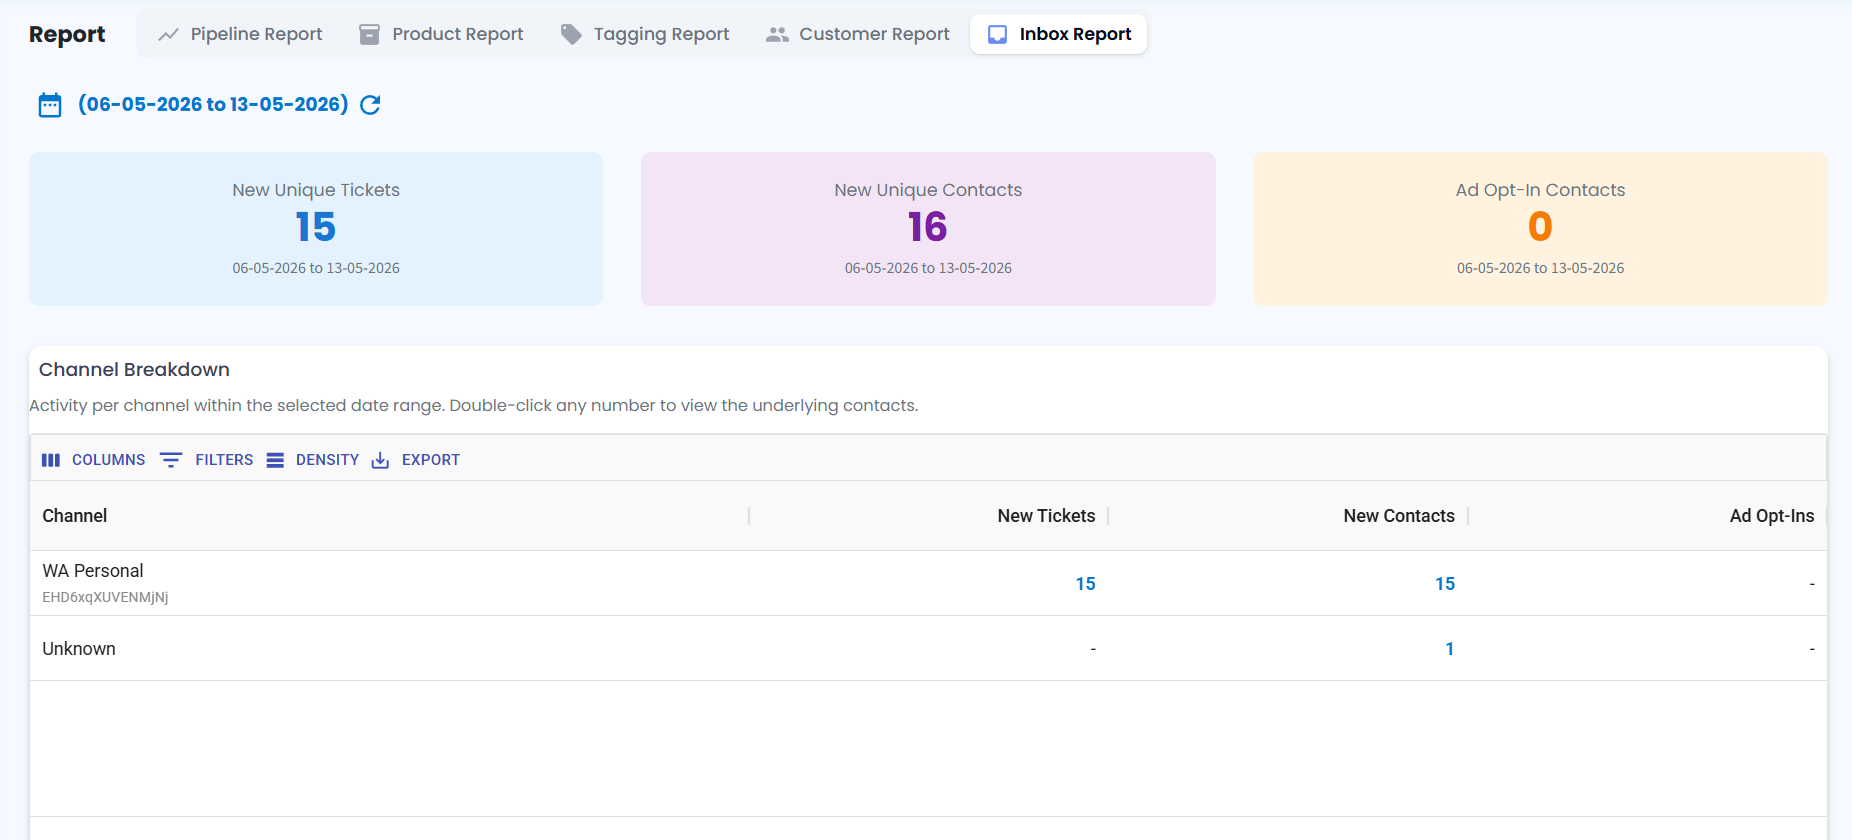
6. Bulk Tagging & Ticket Assign in Inbox 🧩
What's New:
You can now perform bulk actions in Inbox — including tagging and assigning tickets — all at once 😊
What it means to you:
Save time and reduce manual work when managing large volumes of conversations.
Now you can organize and distribute tickets more efficiently with just a few clicks ✅
How you can go about it:
1. Go to your Inbox module and select multiple tickets using the checkboxes.
2. Click again on the checkboxes then click either the "Assign Owner" or "Add Tags".
3. Choose the new owner or the tags you want and click confirm or apply.
Done! All selected tickets will be updated instantly 🎉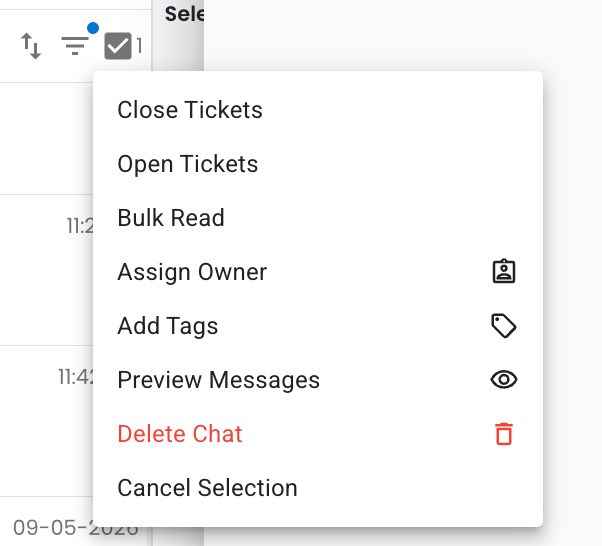
7. Bulk Tag Remove Now Available 🏷️
What's New:
You can now remove tags from your multiple contacts in one go 🎉
What it means to you:
No more removing tags one by one. This saves you time and makes tag management much smoother 🙌✨
How you can go about it:
1. Go to your Contact module and select multiple contacts using the checkboxes.
2. Click on the three dots, click on the "Removed tagging from selected contacts" button that appears.
3. Choose the tags you wish to remove in bulk.
4. Confirm the deletion to apply changes instantly 🚀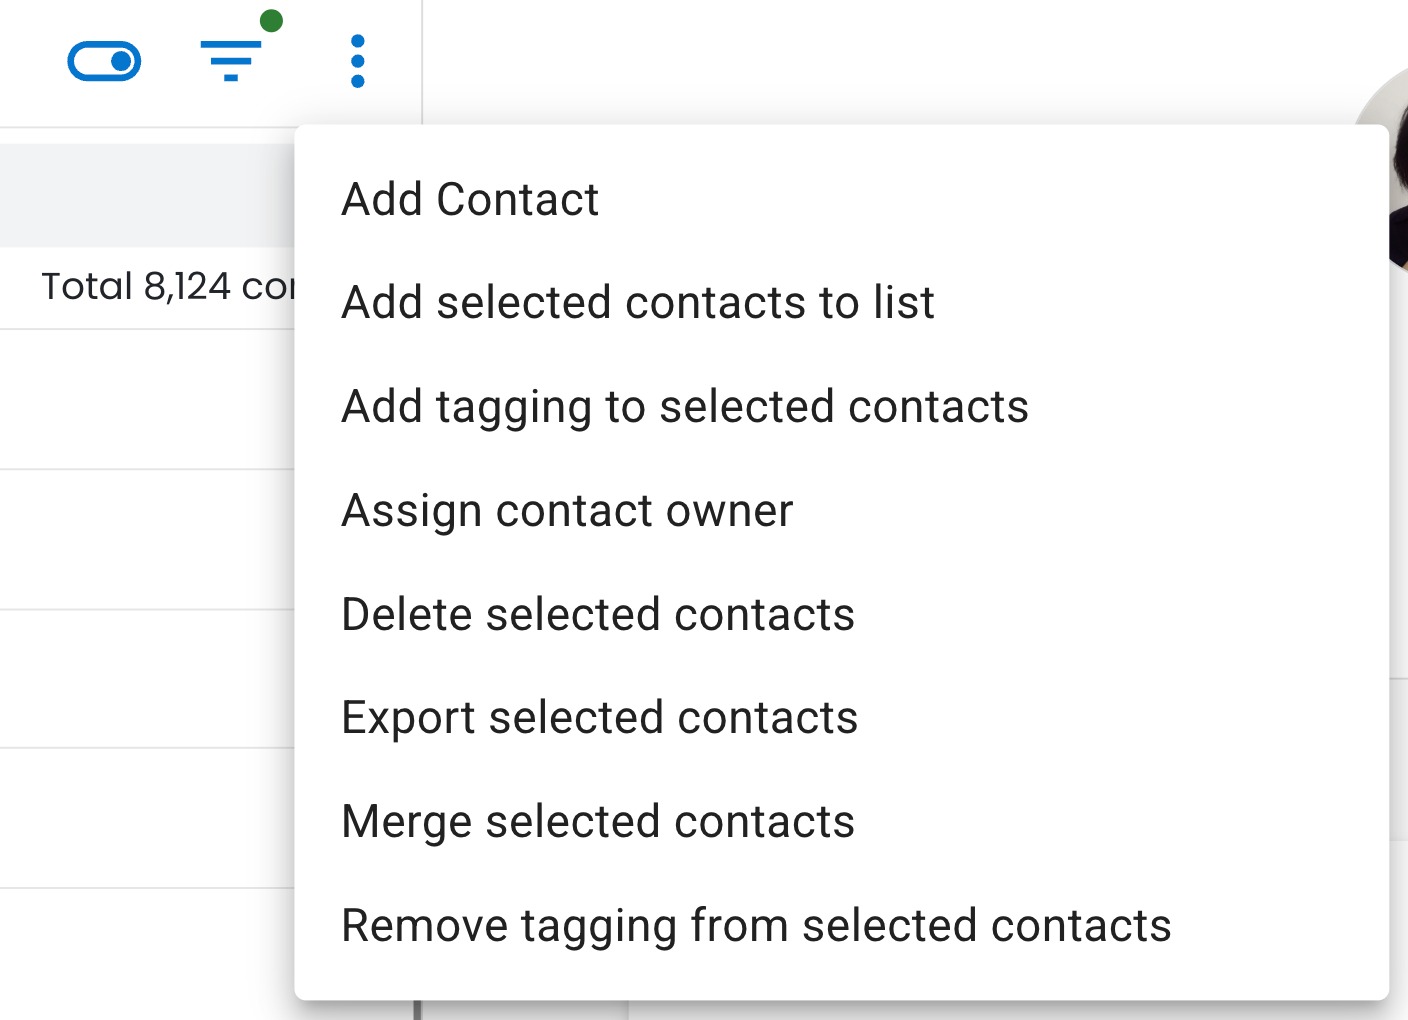
8. Create & Link Contact in Strive Go Inbox 📥
What's New:
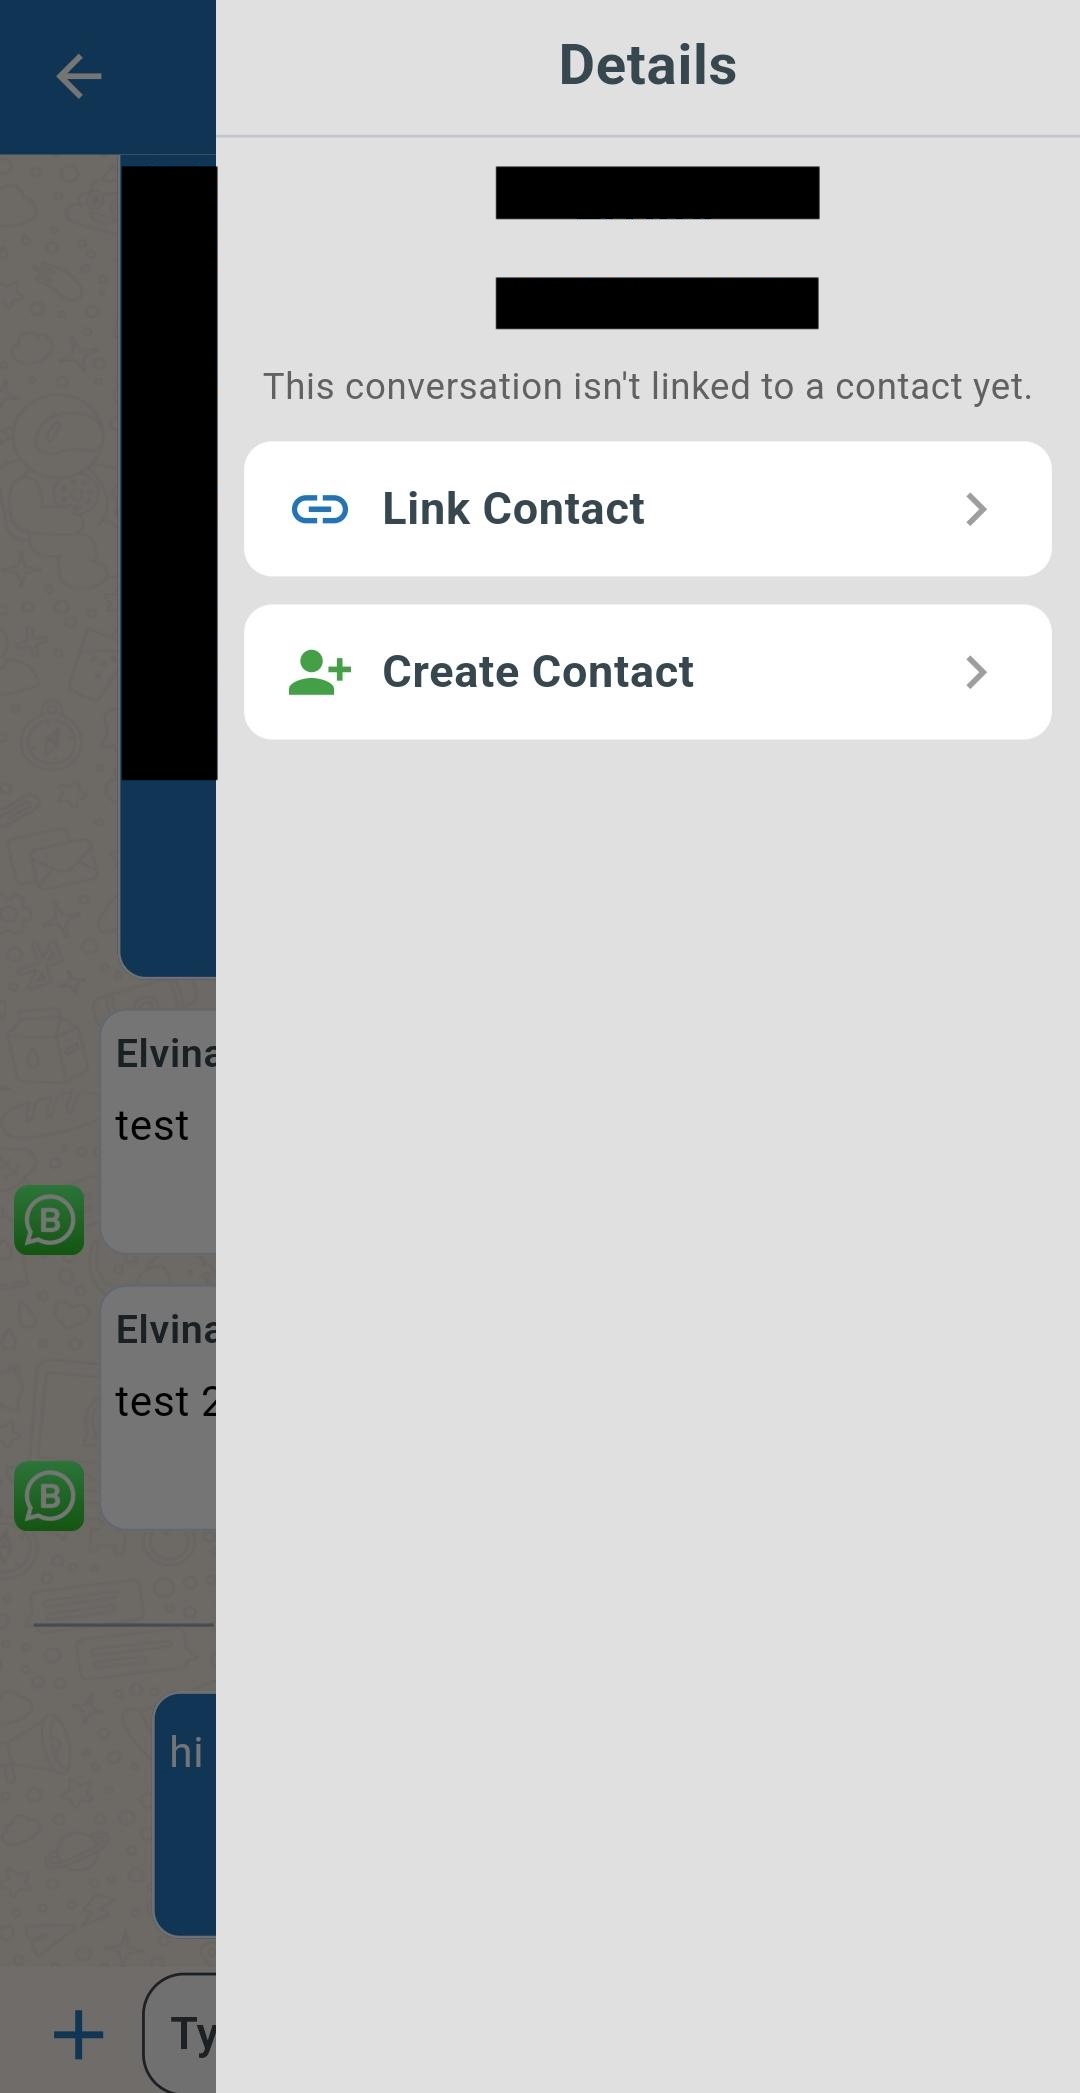
You can now create, link, and unlink contacts directly inside the Inbox chat in the Strive Go app 🎉
What it means to you:
Manage contacts without leaving the conversation. You can now create new contacts, link existing contacts, or unlink contacts directly while chatting ✨
With this enhancement, you can:
✅ Create new contacts instantly
✅ Link existing contacts to conversations
✅ Unlink contacts when needed
✅ Manage contacts without switching modules
✅ Keep conversations organized more efficiently 🚀
How you can go about it:
Open your Strive Go app and navigate to Inbox 📱
Enter a contact chat.
Swipe from the right side of the screen to the left.
You can now select Add Contact, Link Contact, or Unlink Contact ✨
9. CSW Active Smart Branching for Cost Optimization 💰
What’s New:
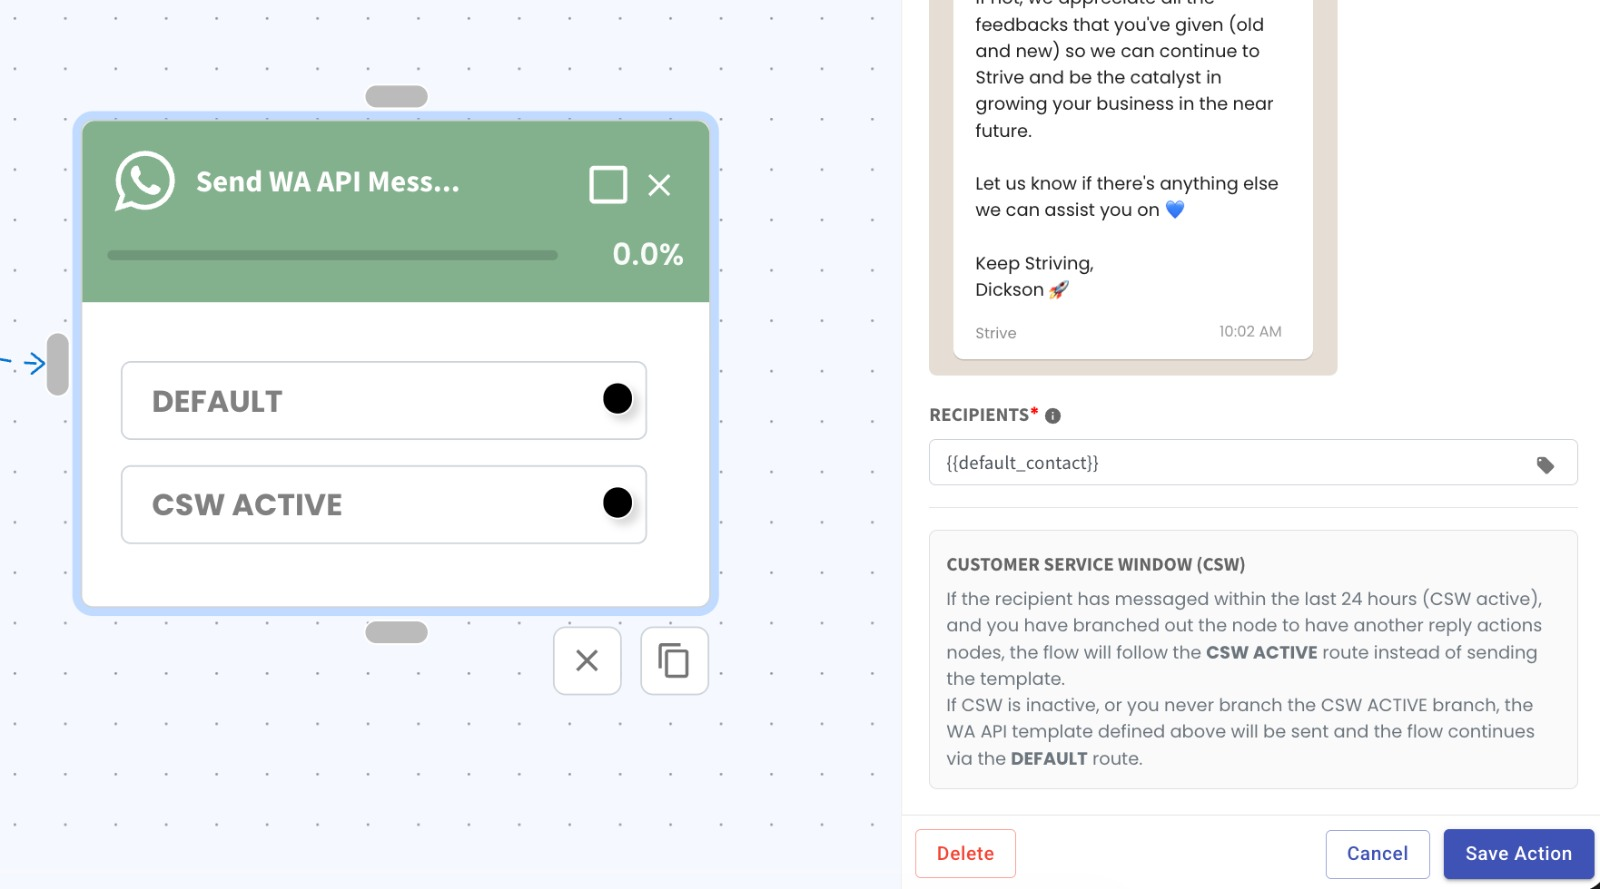
We’ve enhanced the messaging logic by introducing automatic smart branching based on CSW Active (Customer Service Window) 🛡️
What it means to you:
When a contact messages you, the system will automatically detect if CSW Active (within 24 hours) applies 🎯
During this window:
Messages can be sent without using template messages
The system will automatically route through your CSW branch if configured
If no CSW branch is set, it will fall back to the default behavior
This ensures a smoother and more efficient messaging flow without requiring manual setup 💡
How you can go about it:
Open your Flowbuilder
Go to the Send WA API Message block
The system will automatically detect CSW status and handle routing 🚀
10. Introducing Org-Wide Tagging 🏷️
What’s New:
We’re introducing Organization-Wide Tagging 🌐
You can now create tags that are shared across your entire organization, instead of being limited to individual users.
What it means to you:
This allows your team to standardize how contacts are categorized, improving consistency and collaboration. 🤝
If a tag is set to Public, all users can view and use it for tagging and filtering
If a tag is set to Private, only the tag creator and Super Admin can view and use it
How you can use it:
Go to the Contact Module
Navigate to the Tagging section
Create a new tag and choose its visibility (Public or Private)
Start using the tag to organize, filter, and manage contacts more efficiently ✅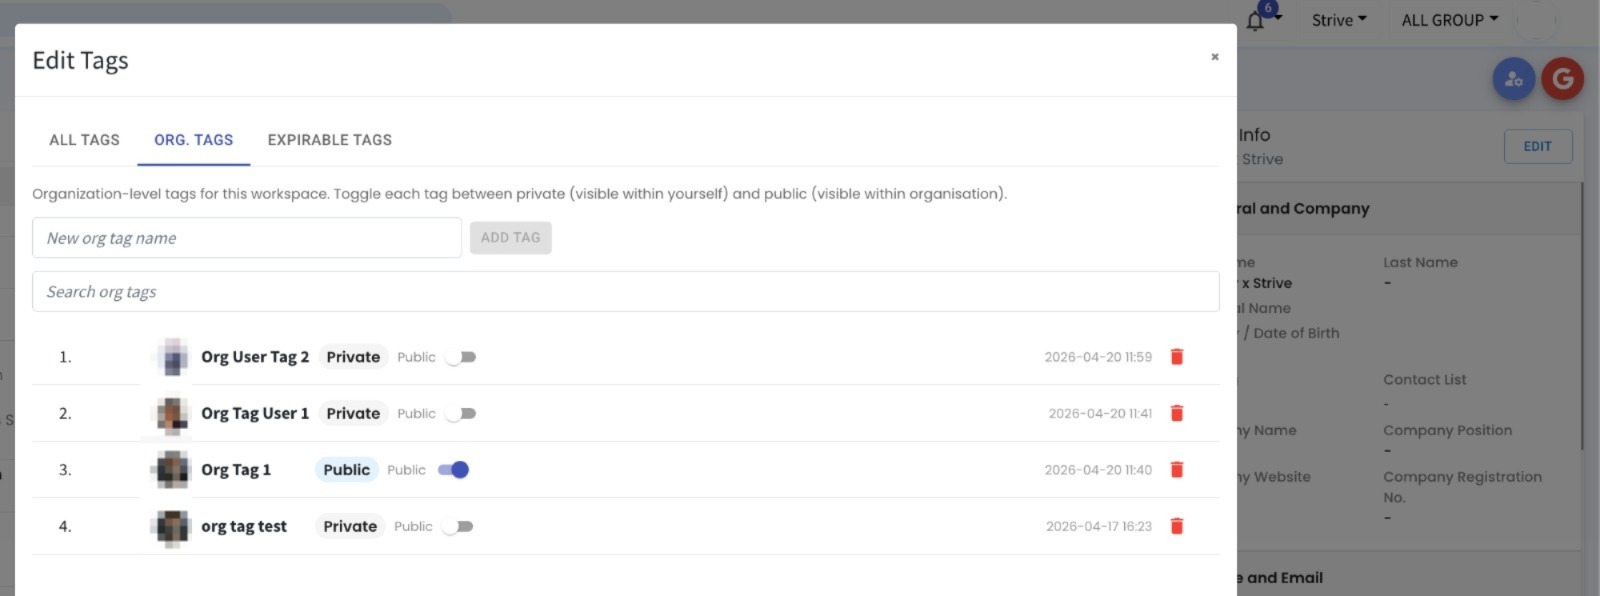
11. Tickets Closed via Flow Now Auto Mark as Read 📥
What's New:
We made a smart change. Tickets closed automatically by Flow are now marked as Read right away. No more manual work needed to clear them. 🎯
What it means to you:
Your ticket list stays up to date without extra effort. You can focus on active tickets instead of cleaning up closed ones. 📈💡
How you can go about it:
1. Set up your Flow rules to auto-close tickets after a time period.
2. Let the flow run. The closed ticket will be marked Read for you automatically.
3. Check your ticket list. You will see it updated without any action from you. 🎉🚀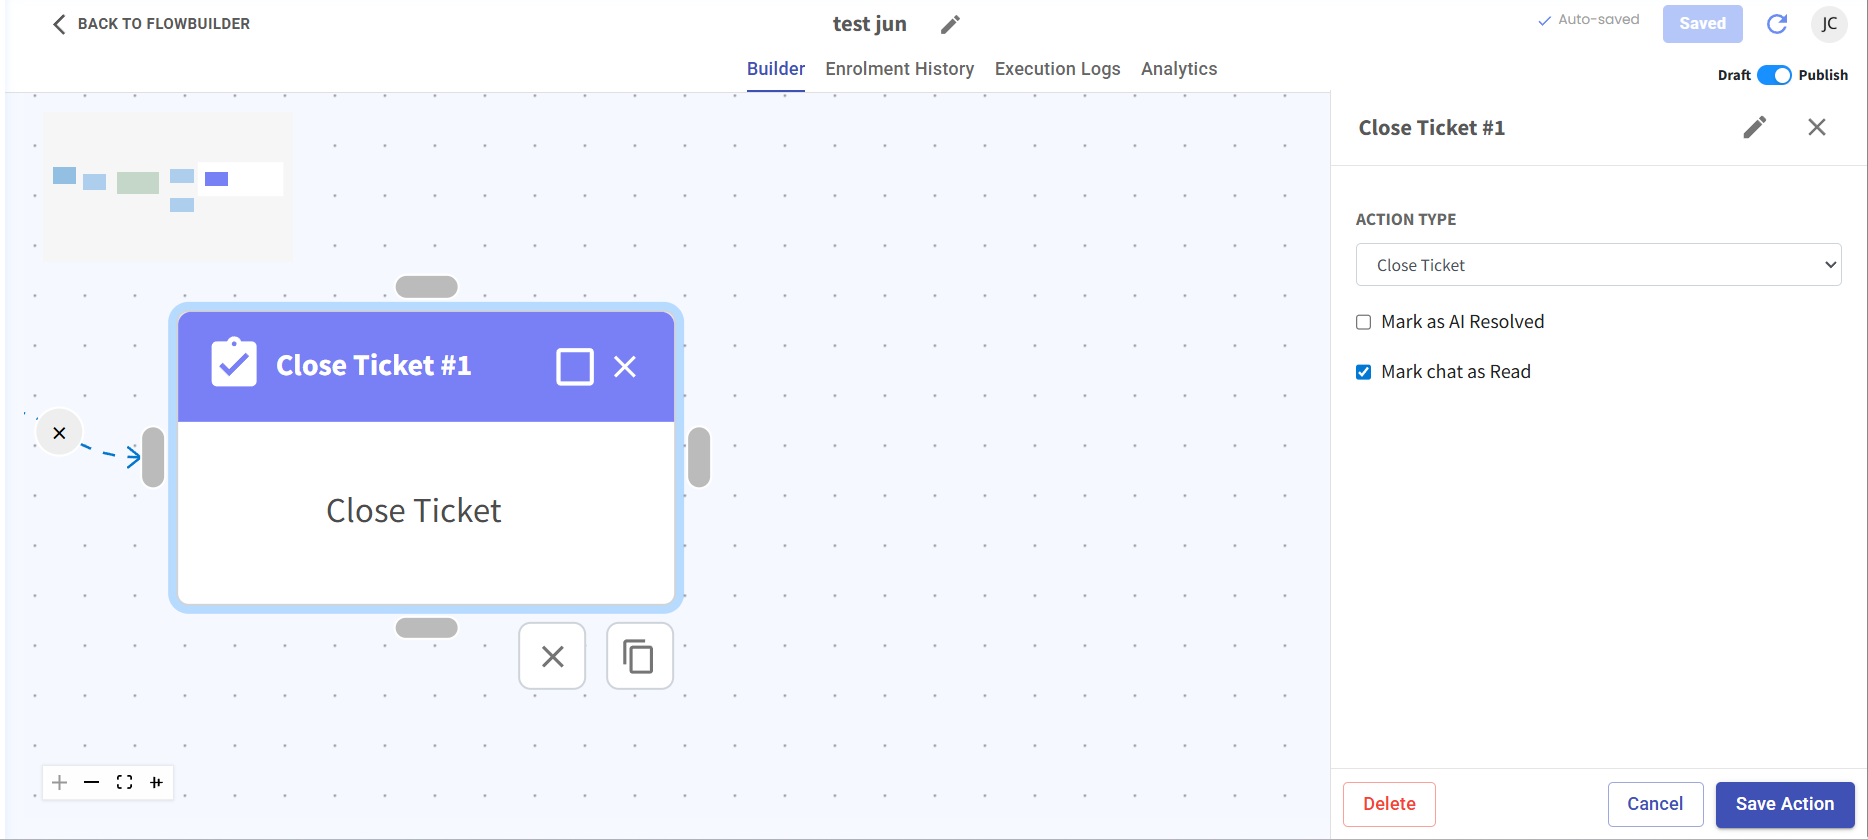
12. No Reply Trigger Option Added 🔔
What’s New:
You can now simulate what happens when a customer does not reply within a set time window. 🕒
What it means to you:
This helps you test waiting periods and time-based actions without needing an actual customer response. It makes your flow testing more realistic and thorough. 🚀
How you can go about it:
Open Flowbuilder
Select the No Reply action in your flow
Set the time window (for example, 1 hour)
Open the Simulation feature (bottom right of the flow)
Click No Reply to simulate the scenario and test your flow ✅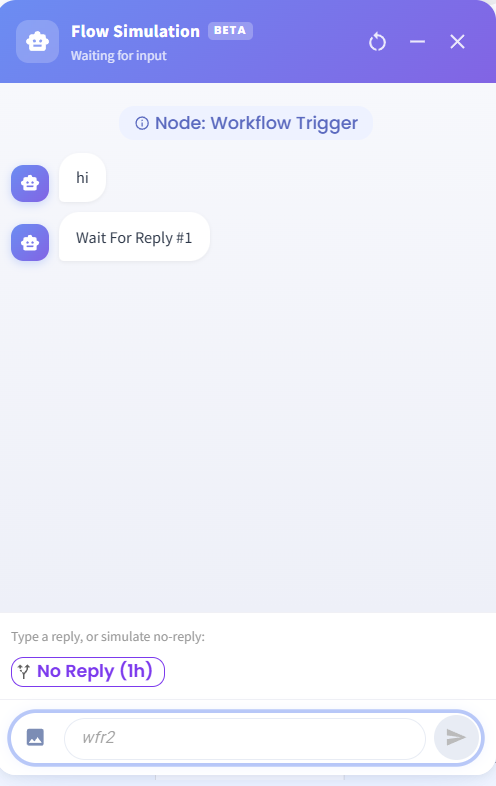
13. Refresh Templates with One Click 🔄
What’s New:
You can now refresh WhatsApp API templates directly in Flowbuilder with a single click. 🎯
What it means to you:
No more switching the sender channel just to update your template list. 😊 This saves time and keeps your workflow smooth. ✨
How you can go about it:
Open the Send WhatsApp API Message action in Flowbuilder
Click the refresh icon next to the template field
Open the Choose WhatsApp Template dropdown to see the updated list instantly 🚀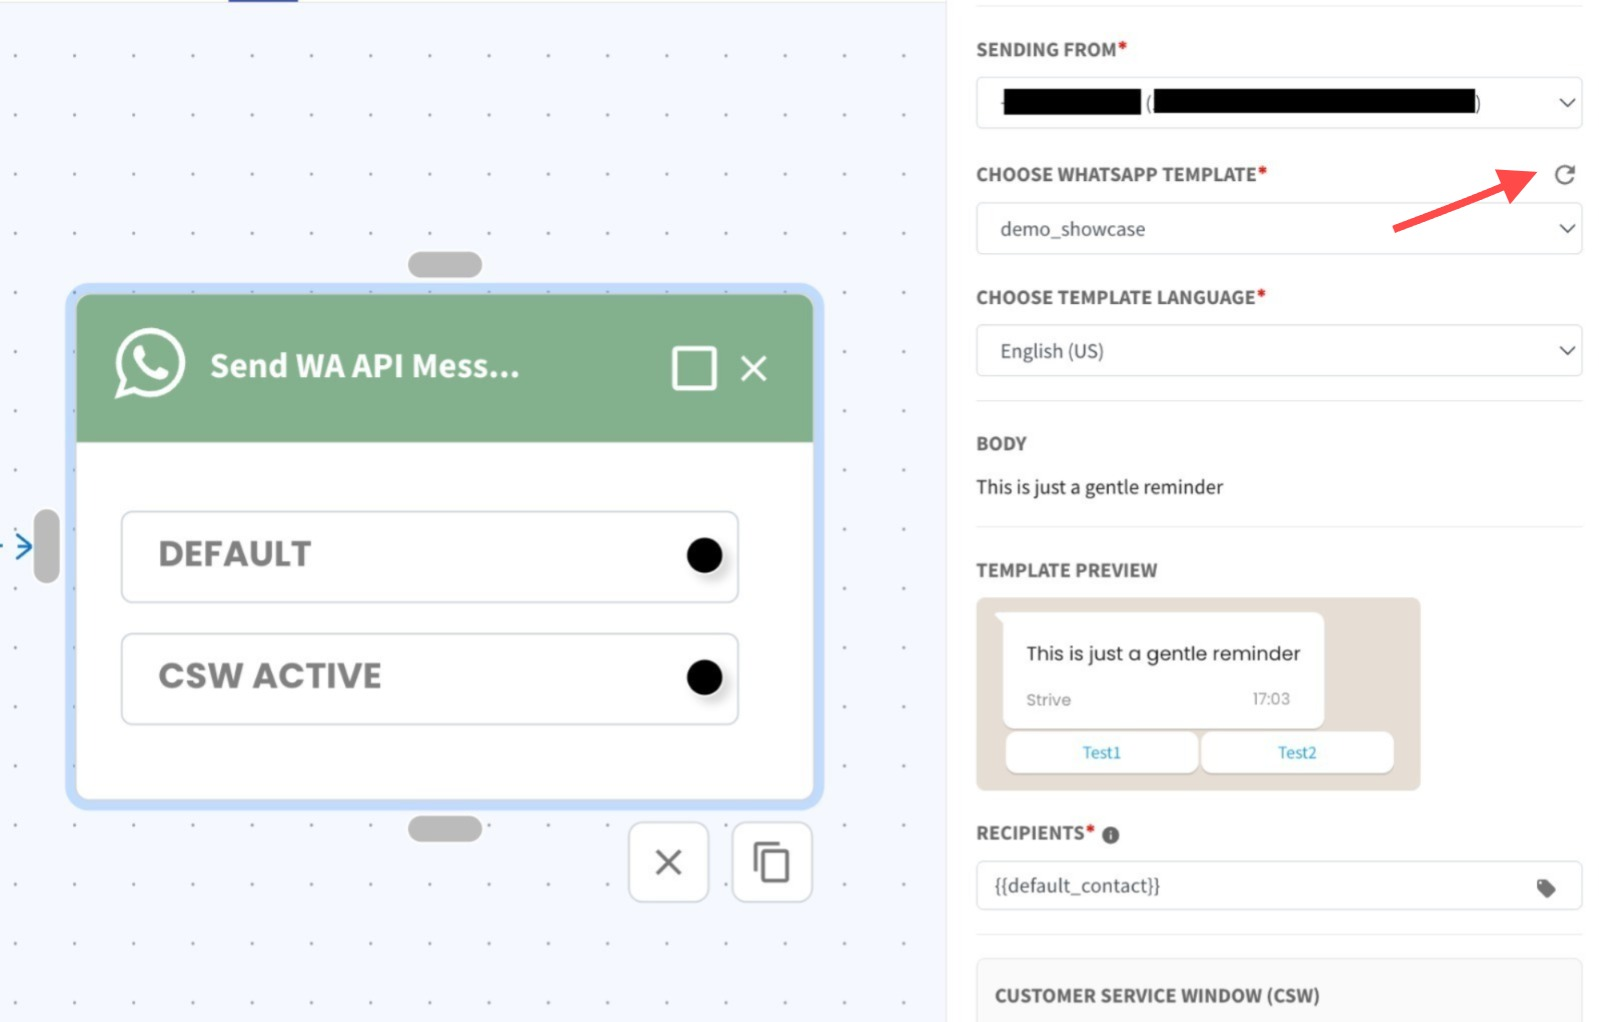
14. WhatsApp API Buttons & Message Formatting Preview Update 🎯
What’s New:
You can now see real-time previews for WhatsApp API button templates, including improved text formatting support 🧩
Button templates are displayed directly in the action preview screen
Bolded and italic text formatting is now shown in the preview ✨
What it means to you:
This gives you a clearer and more accurate preview of your message before sending. You can now easily verify both button layout and formatted text (bold / italic) to ensure everything appears correctly 👍
How you can go about it:
Select send WhatsApp API message action in flow.
Select the template.
The preview will automatically display both buttons and formatted text in the action panel 🚀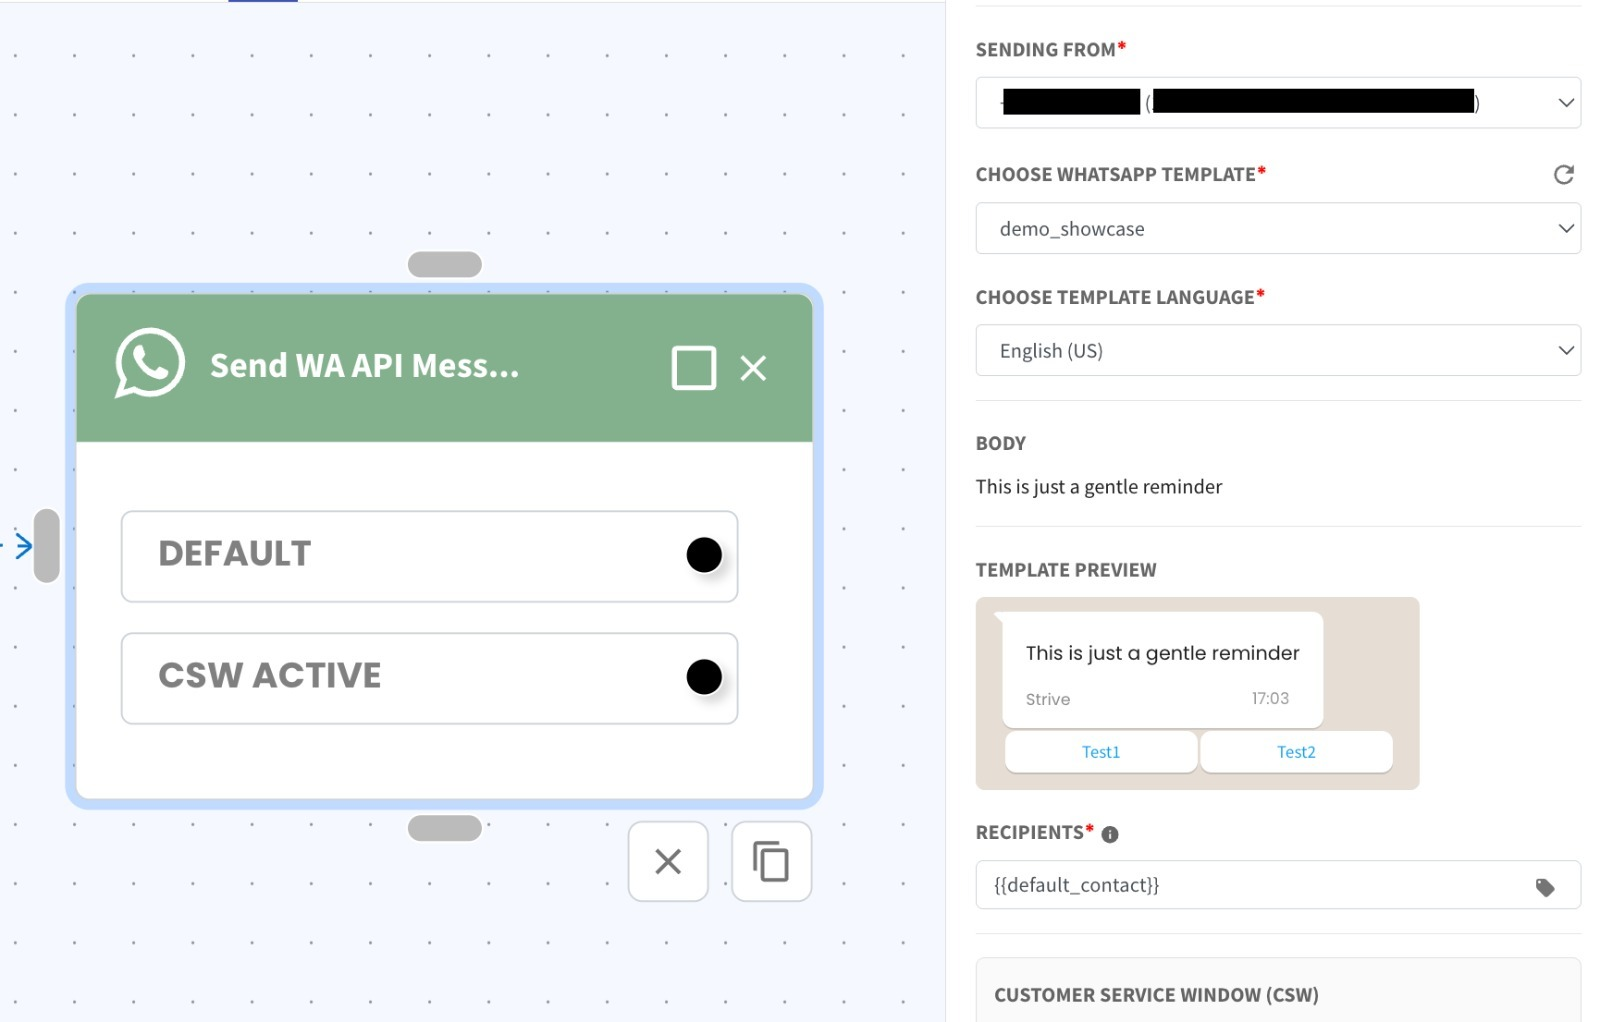
15. Super Admin Can Now Configure WhatsApp Personal Setup 📱
What’s New:
Super admins can now enable or disable Auto Create Contact and Inbox access for WhatsApp Personal channels. Previously, these settings were only available to the number owner. ✅
What it means to you:
You now have full control over how WhatsApp Personal channels behave without relying on the number owner. 🎉⚙️
This makes it easier to manage contact creation and team access centrally.
How you can go about it:
1.Go to WhatsApp Personal Setup
2.Toggle Auto Create Contact and/or Inbox access as needed
3.Changes apply instantly—no need to save 🚀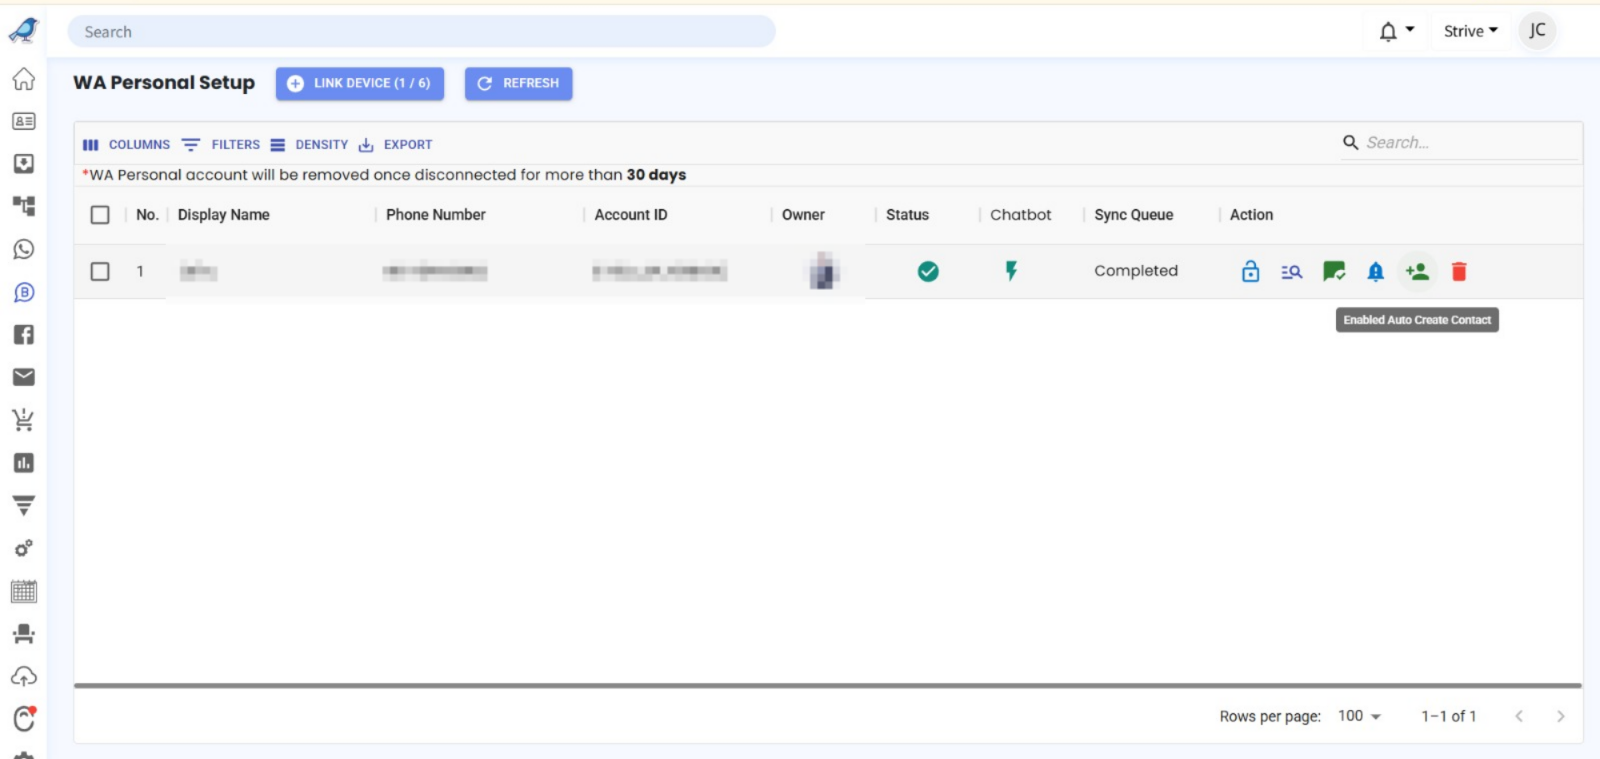
16. Zip files now supported 🎉
What's New:
You can now send ZIP files directly through Strive. This makes it easier to share multiple or large files in a single message 📦
What it means to you:
No more splitting files or using workarounds. Share compressed content faster and keep conversations tidy ✨
How you can go about it:
1. Click the + icon in inbox chat.
2. Click on "Document" and select your ZIP file from your device
3. Send like any other file type 🚀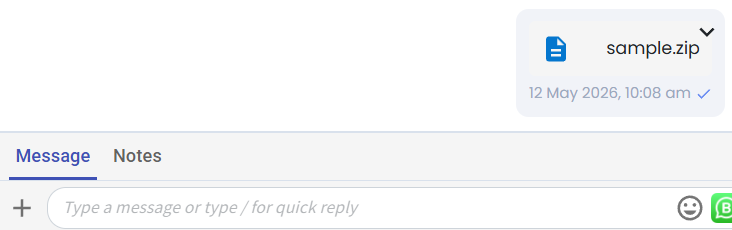
17. New Date Export Columns for Better Contact Insights 📅
What's New:
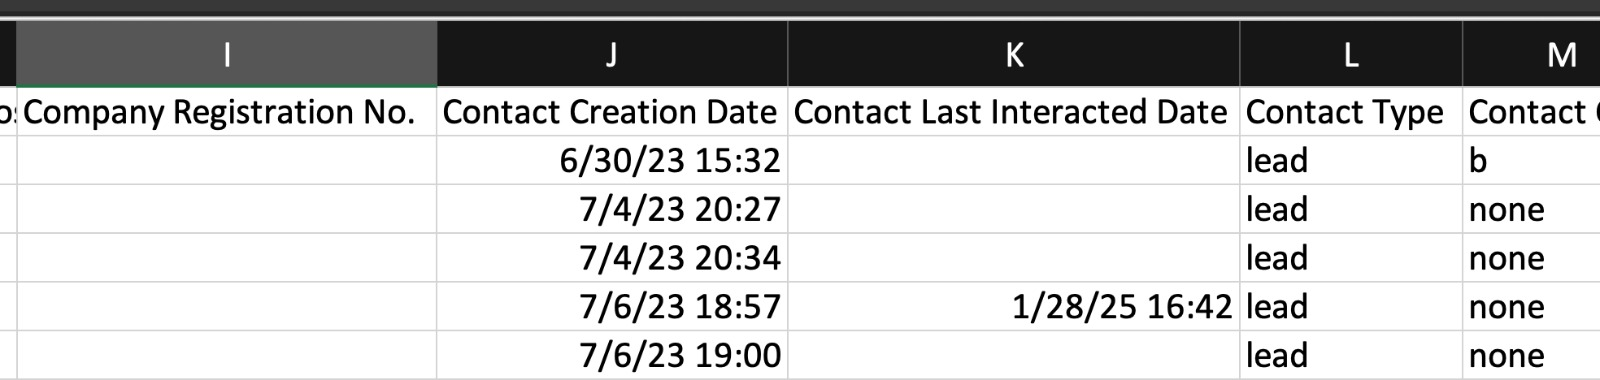
We have added two new date fields to the contact export file. You can now see when a contact was created and their last interaction date. 🎉
What it means to you:
This gives you more context on each contact without extra work. You can now easily identify inactive contacts and understand engagement history. 📊
How you can go about it:
Go to the Contact module
Select the contact(s).
Click export.
Open the exported file.
No extra configuration needed, start exporting today! 🚀
______________________________________________________________
This wraps up the May 2026 update. We truly appreciate your continued support and trust in Strive. Stay tuned for more exciting improvements coming your way in the next update 🙂