How KPI Pipeline Works
Open KPI Pipeline from More > Sales. Create a board with a name, goal and average case size in your board currency, then import the Sales Template or add your own stages. Set each stage’s conversion percentage to see how many more deals you need, add deals (the value defaults to the average case size), and move them from the deal panel or by dragging. Read Goal, Shortfall and Avg. Case Size on the board, or use List View for % Goal Achieved. Configure privacy, currency, notifications and Reset Setting in Board Settings.
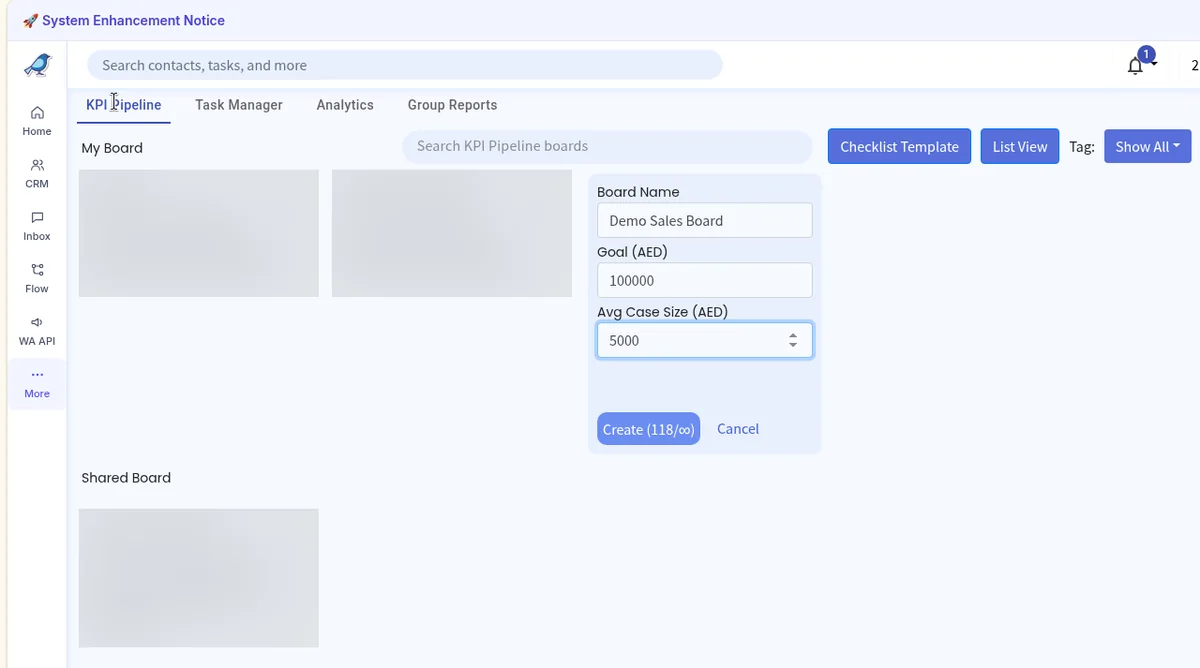
KPI Pipeline is where you set a sales goal, move deals through stages, and see how many more deals you need to reach that goal. Boards you own appear under My Board. Boards shared with you appear under Shared Board.
1. Open KPI Pipeline
In the left sidebar, click More.
Under Sales, click KPI Pipeline.
You land on the KPI Pipeline tab. The other tabs on this page are Task Manager, Analytics and Group Reports. Stay on KPI Pipeline.
2. Create a board
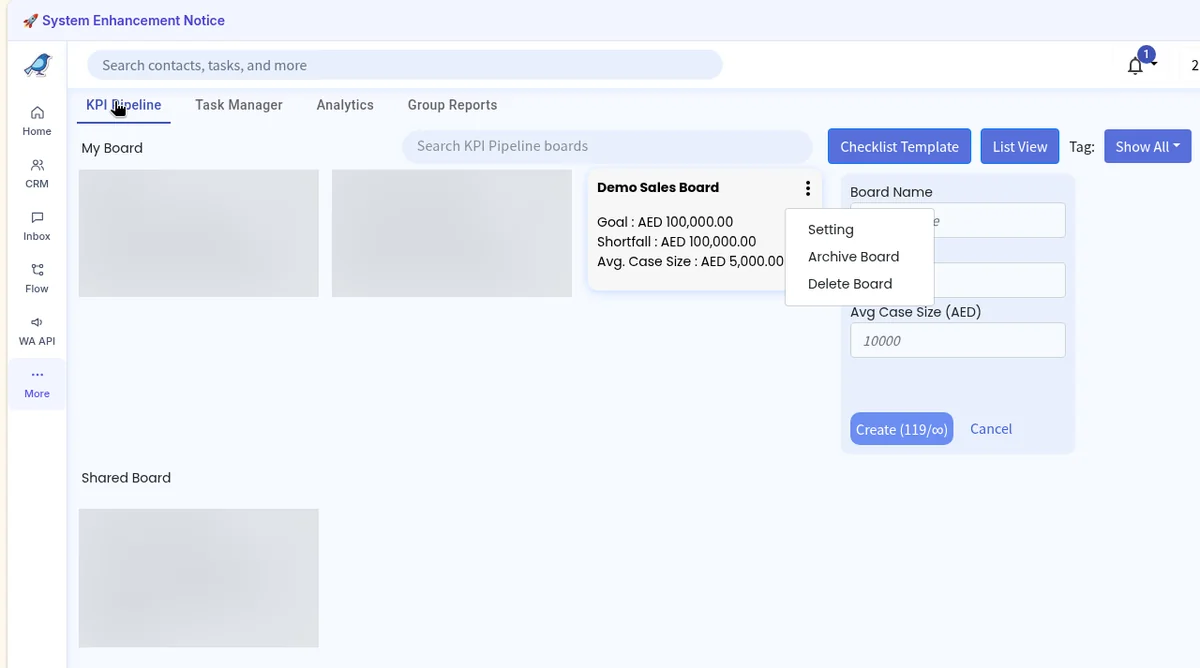
Fill in Board Name, Goal and Avg Case Size. Goal and Avg Case Size are shown in your board currency — the label in the form uses that currency.
Click Create.
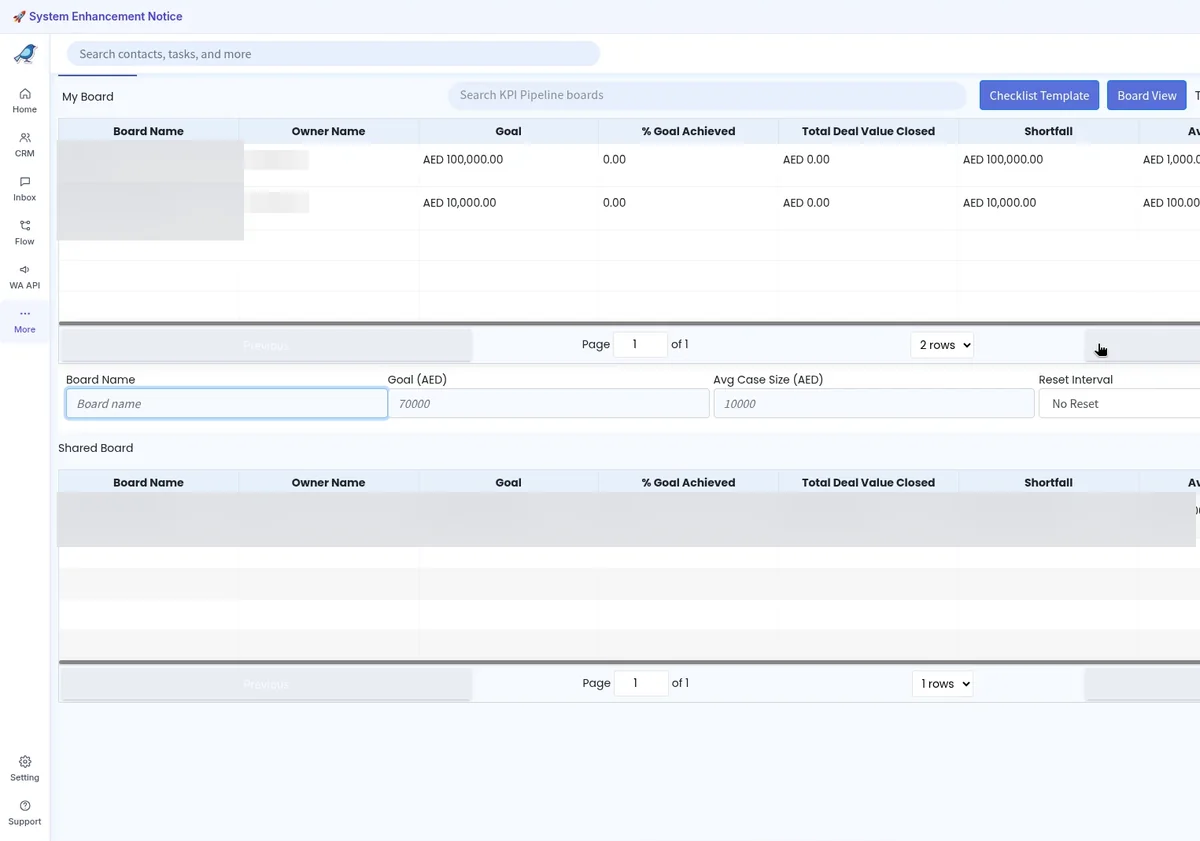
On the board cards page, the create form has these three fields only. You can set a reset schedule later in Board Settings. If you switch to List View, the create form also includes a Reset Interval field.
3. Import the Sales Template
Open the board you just created. You can add stages yourself with the + button between columns, or import a ready-made process:
Click Import Template.
Choose Sales Template, then Import.
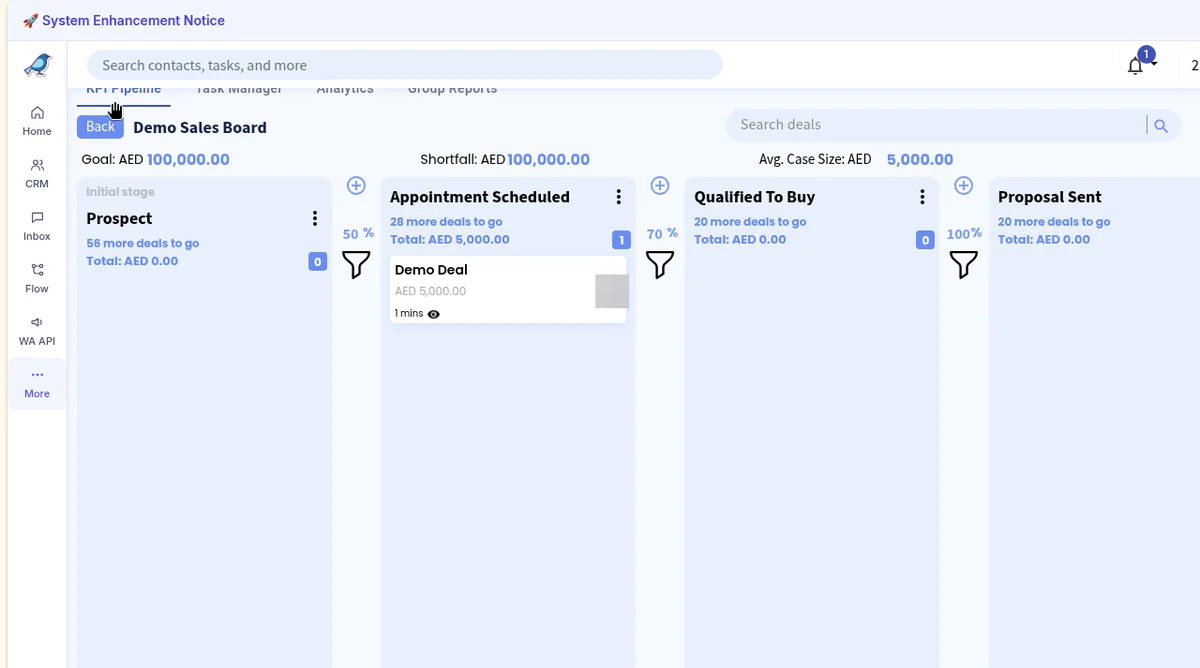
The Sales Template stages are Prospect (the Initial stage), Appointment Scheduled, Qualified To Buy, Proposal Sent, Negotiation, Quotation Sent, Signed Quotation (Closed Won) and Closed Lost. You can rename stages after you import them, or skip the template and build your own process.
4. Set conversion percentages
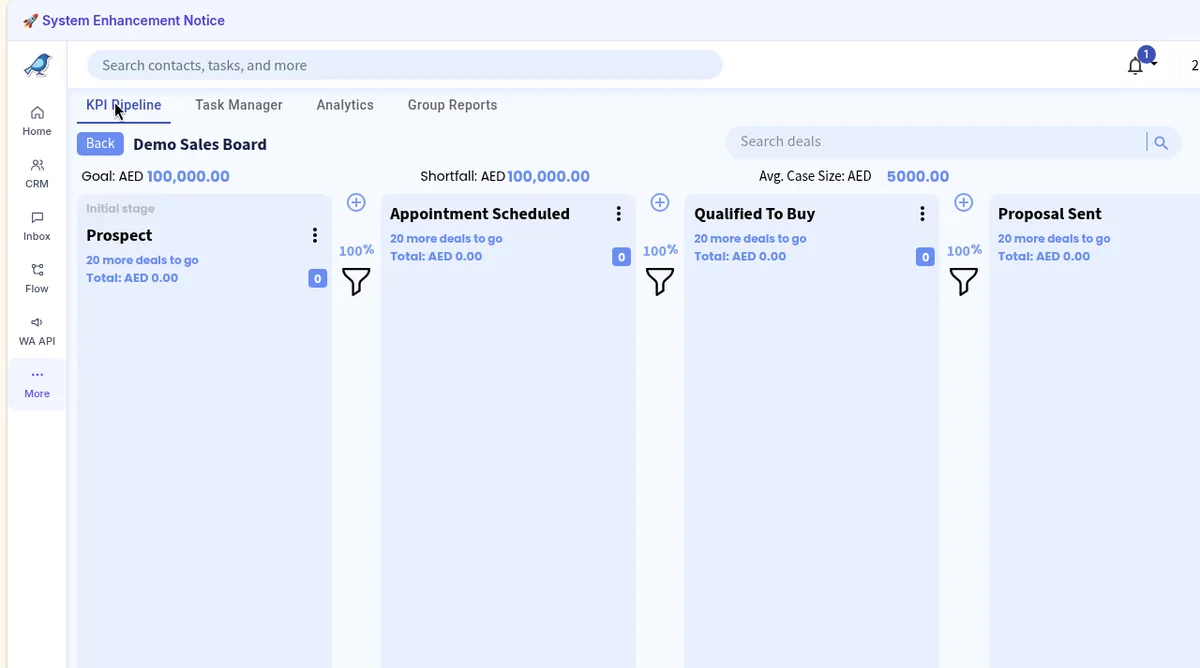
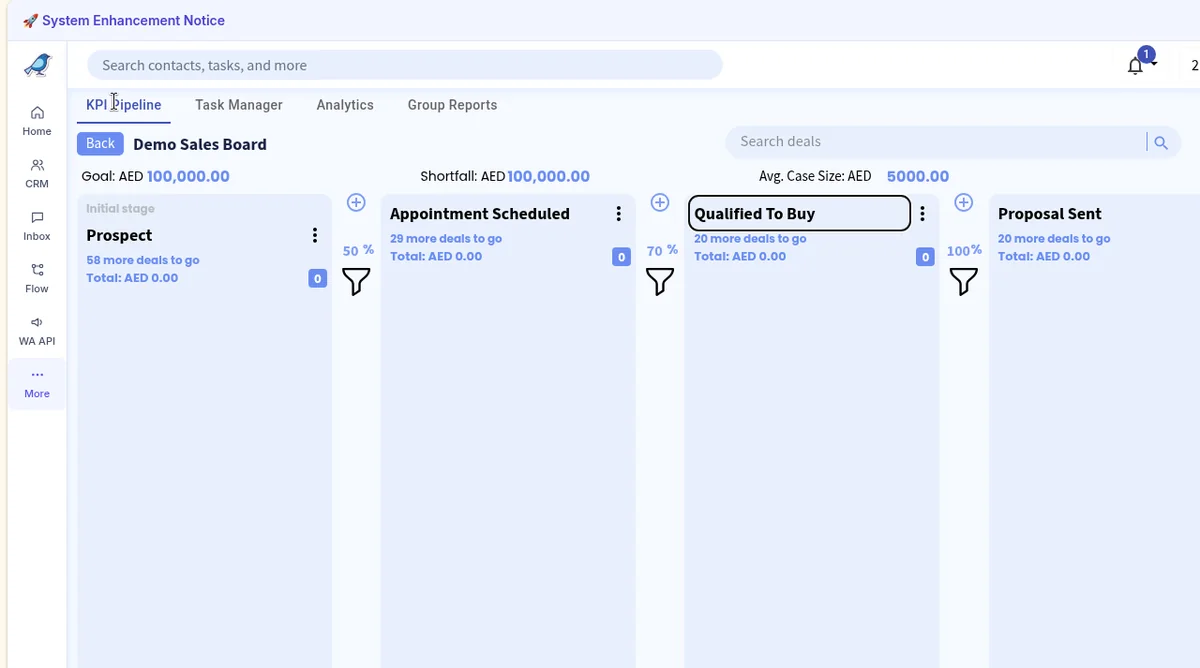
Each stage shows a conversion percentage — the share of deals you expect to move from that stage to the next. It starts at 100%.
Click the percentage on a stage and enter a new value.
The stage then recalculates how many more deals you need, shown as X more deals to go.
For example, with a goal of 100,000 and an average case size of 5,000, every stage at 100% shows 20 more deals to go. If you set one stage to 50% and the next to 70%, the first stage may show 58 more deals to go and the next 29.
5. Add a deal
In a stage, click Add at the bottom of the column, or the + at the top of the stage.
Enter a title in Deal Title... and click Save.
The deal value defaults to the board's Avg Case Size. You can change it.
You can also link a contact to the deal from Contacts in the deal panel.
6. Deal details
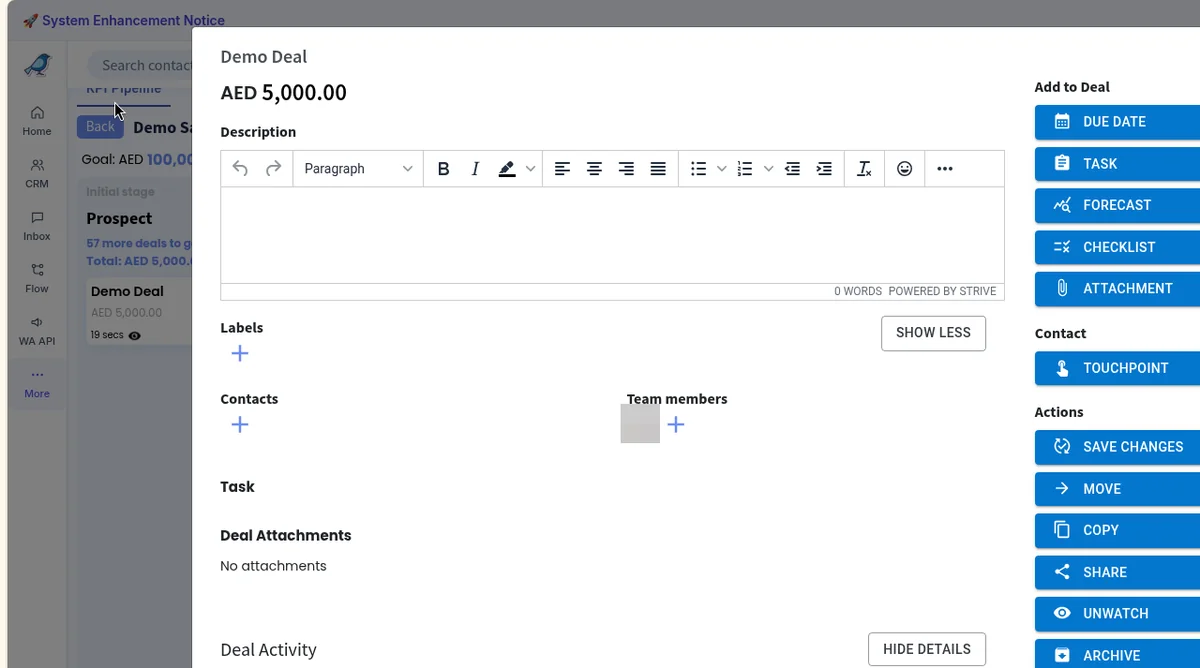
Click a deal to open its panel. You can fill in Description, Labels, Contacts, Team members, Task, Deal Attachments and Deal Activity.
On the right, under Add to Deal, you can add Due date, Forecast, Checklist, Attachment and Touchpoint.
The actions are Save Changes, Move, Copy, Share, Unwatch, Archive, Lock and Delete. Click Save Changes after you edit the deal.
7. Move a deal
Open the deal and click Move.
Choose the Board, Stage and Position, then click Move Deal.
You can also drag a deal to another stage.
If you move a deal into the final won stage (for example Signed Quotation (Closed Won) on the Sales Template), you may be asked to confirm the deal amount. People you select under Notification Setting can be notified when a deal is won.
8. Read the KPIs
At the top of a board you will see:
Goal — the target you set for the board.
Shortfall — how much is still left to reach the goal.
Avg. Case Size — the default value used for new deals.
Each stage also shows its conversion percentage, X more deals to go, a Total, and a deal count.
To compare boards side by side, click List View. That table includes % Goal Achieved, Total Deal Value Closed, Shortfall and Avg. Case Size. Click Board View to return to the cards.
9. Board menus and settings
On a board card, open the menu (three dots) for Setting, Archive Board and Delete Board.
Inside a board, the menu at the top right includes Pipeline Forecast, Archived Deals, Deal Lost Reasons, Deal Display and Table View.
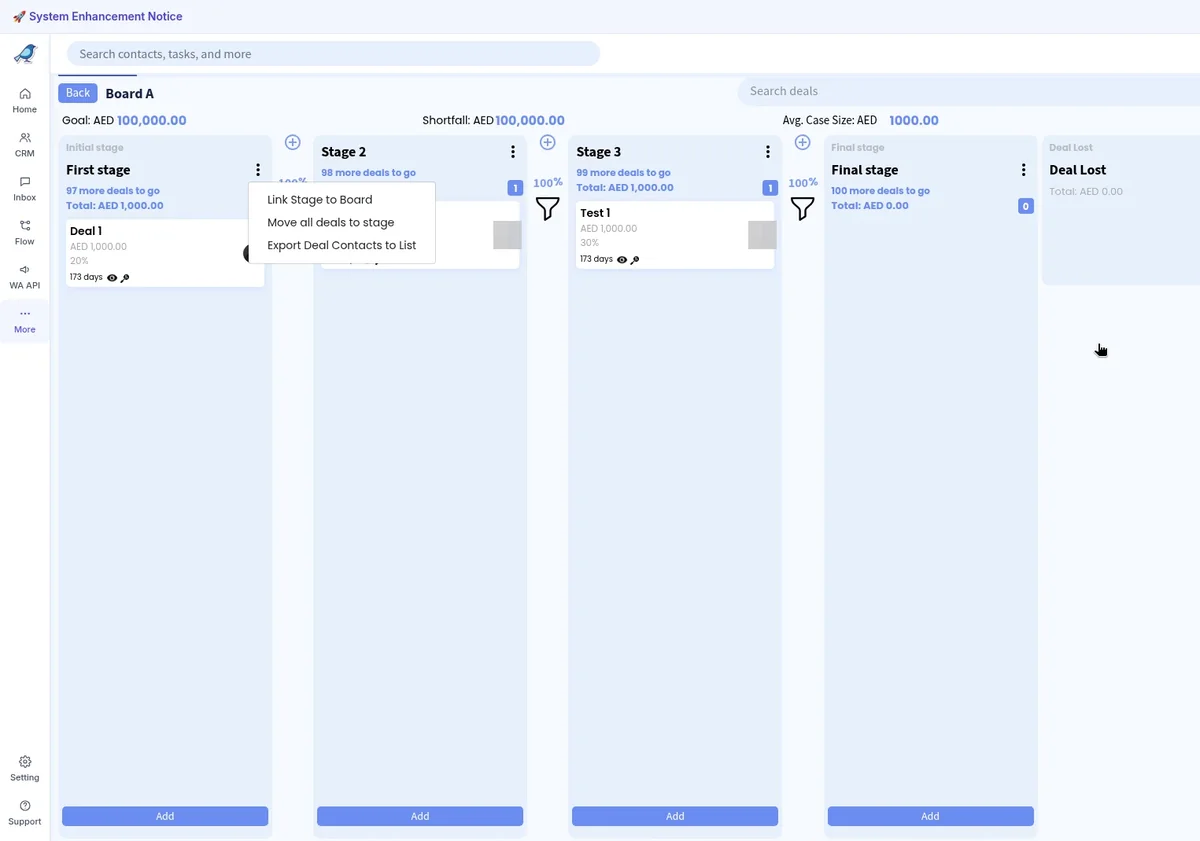
On a stage, the menu includes Link Stage to Board, Move all deals to stage and Export Deal Contacts to List.
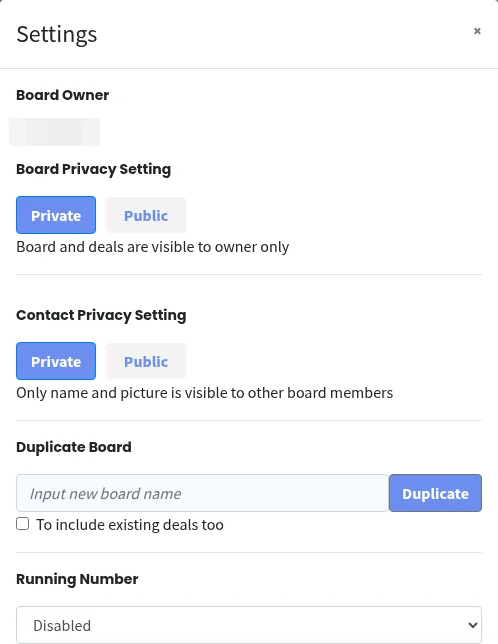
Open Setting on a board card to configure:
Board Owner
Board Privacy Setting — Private or Public. Private boards and their deals are visible to the owner only.
Contact Privacy Setting — Private or Public. The note under this setting says only the name and picture are visible to other board members.
Duplicate Board — optionally include existing deals.
Running Number — Disabled by default.
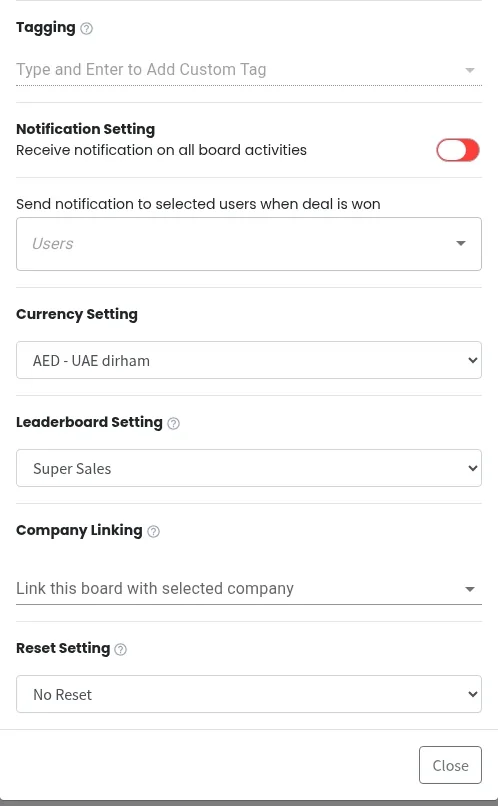
Tagging
Notification Setting — turn on notifications for board activities, and choose users to notify when a deal is won.
Currency Setting — the currency shown on the board for Goal, Shortfall, Avg Case Size and deal values.
Leaderboard Setting — Super Sales or Super Leader.
Company Linking — link the board with a selected company.
Reset Setting — No Reset (default), Monthly, Quarterly, Half Yearly or Yearly.
Common questions
Why do the amounts show a currency such as AED? That is your board's Currency Setting. Change it in Board Settings if you need a different currency.
How do I reset a board on a schedule? Use Reset Setting in Board Settings. In List View, a Reset Interval field is also available when you create a board. The default is No Reset.
Can I share a board with others? Set Board Privacy Setting to Public. Shared boards appear under Shared Board for people who can see them.
Do I have to use the Sales Template? No. Add and rename stages to match your own process, or start from the template and edit it.