How to Create a Segment and Auto-Update It with a Template Trigger
Go to CRM > List (strive.asia/list) > SEGMENT. Click START FROM SCRATCH (or click one of the 13 default templates to open it with its conditions already filled in), enter a Segment name, add conditions with Add condition (AND/OR groups), then click Create template to save it for reuse and/or Create list to save a contact list named ' - DD-MM-YYYY'. To auto-update it, open Template Triggers > CREATE TRIGGER, enter a Title, pick your custom template, choose Schedule Mode (Repeat by interval, or Monthly date and time, default day 1 at 09:00) and optionally an Overwrite List (when set, the same list is cleared and rebuilt each run; when not set, each run creates a fresh separate list), then click CREATE TRIGGER. New triggers are on by default; switch one on or off with the toggle in the Status column. To act on the list, create a flow in Flows > Create Flow with Flowbuilder Type 'Segment', pick the segment trigger and channel, add a step such as Send WA API Message, save and switch Draft to Publish. By default the flow runs only for contacts newly added to the list; tick the re-trigger checkbox to run it for every matching contact on every scheduled run. Needs the Contact List permission, plus Automation for Template Triggers.
A segment is a group of contacts that match conditions you choose, such as birthday this month, a tag, a purchased product or lifetime value. You can save it once as a contact list, or save it as a template and let a Template Trigger rebuild the list on a schedule. A flow with a Segment trigger can then message everyone in it, for example a birthday greeting every month.
Before you start
You need access to CRM > List and, for the flow part, to Flows. In Setting > Roles you need the Contact List permission, plus Automation to create Template Triggers.
To send a WhatsApp message from the flow, you need a connected WA API channel and an approved WhatsApp template.
Segment conditions do not include Lifecycle stage. To filter by Lifecycle, use the Contacts filter instead.
1. Open Segment
In the sidebar, go to CRM > List, or open strive.asia/list.
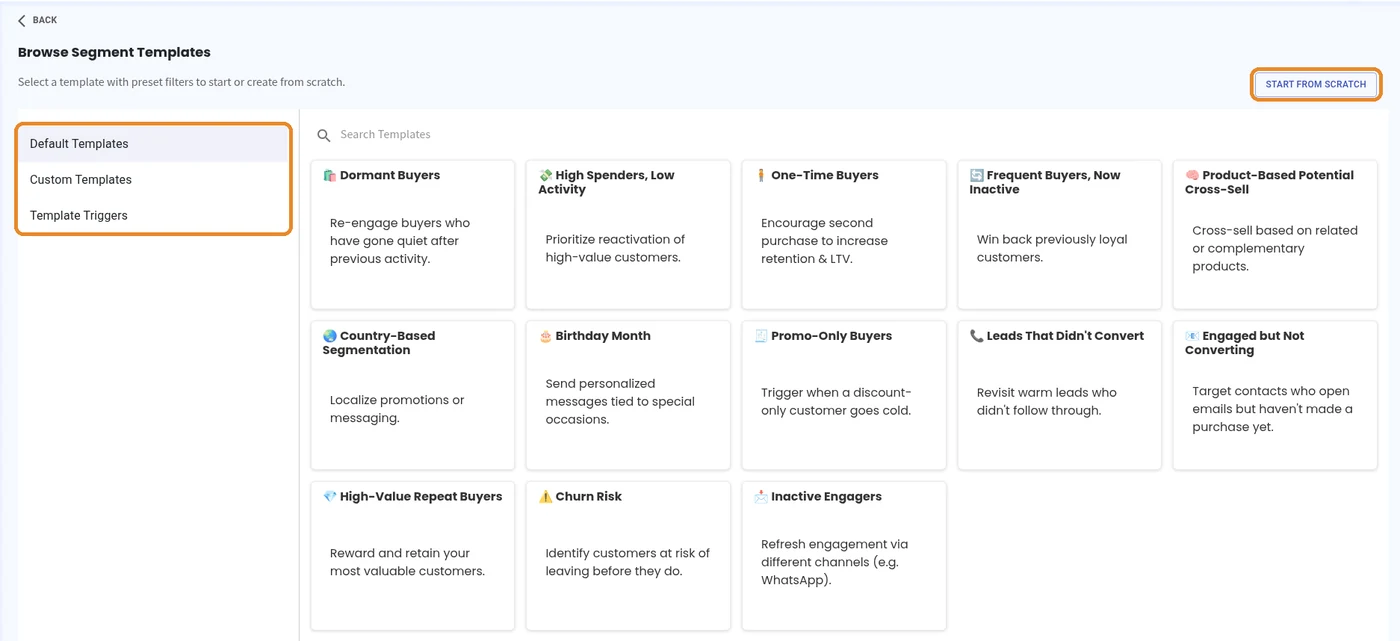
Click SEGMENT. The Browse Segment Templates page opens.
On the left you have Default Templates (13 ready-made templates such as Dormant Buyers, Birthday Month and Churn Risk), Custom Templates (the ones you save) and Template Triggers.
Click a default template to start from its preset filters, or click START FROM SCRATCH. A default template opens the segment builder with its conditions already filled in, ready for you to adjust.
2. Build the segment
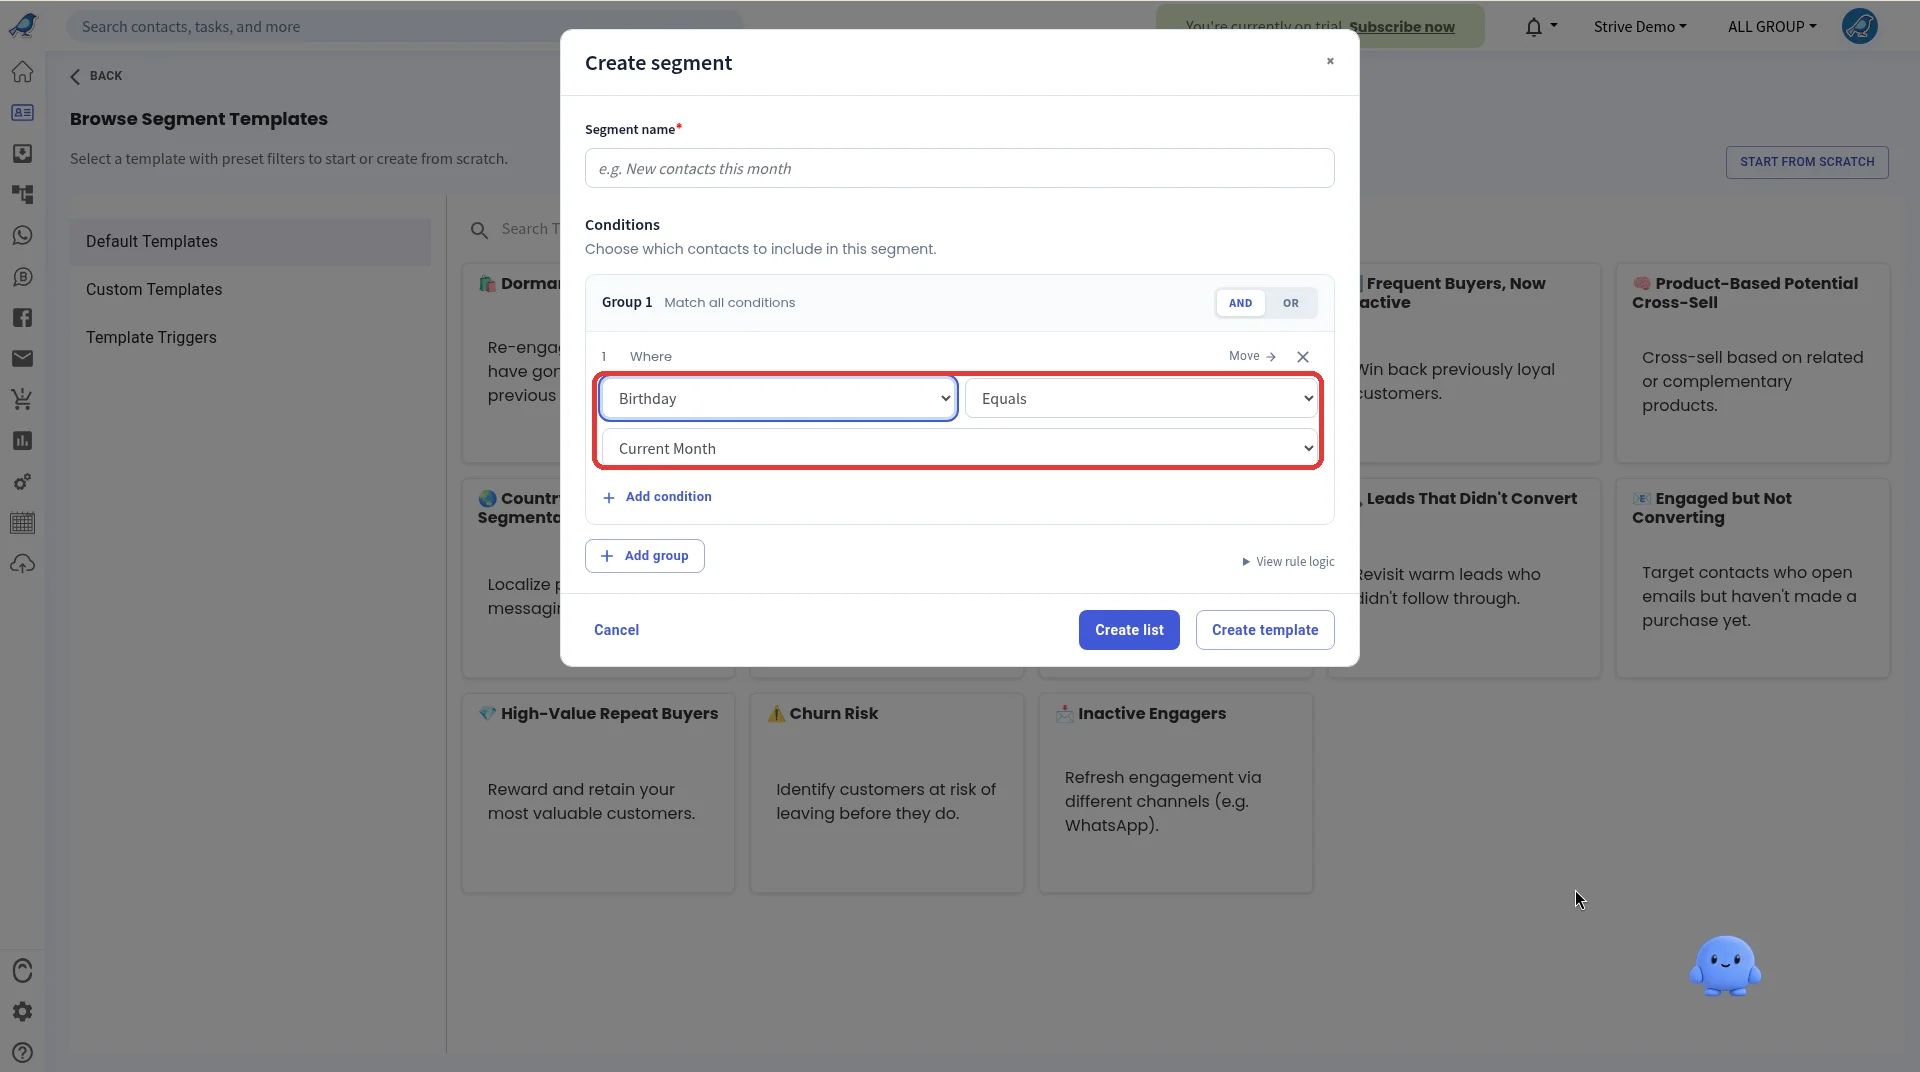
In Create segment, type a Segment name (required), for example "Birthday this month".
Under Conditions, set the first condition: choose an activity, an operator and a value. For a birthday list, choose Birthday, Equals, Current Month.
Click Add condition to add more conditions to the same group. Use AND (contacts must match all) or OR (contacts can match any).
Click Add group for another set of conditions, and View rule logic to check how the groups combine.
There are 24 condition activities to choose from, including Birthday, Contact tagging, Lifetime value, Purchased product, Last message interaction, Relationship persona and Contact status.
3. Save it as a template, a list, or both
Create template saves the conditions as a reusable template under Custom Templates. The window stays open after you click it, so you can also create a list straight away. You need a custom template to use a Template Trigger.
Create list saves the contacts who match right now as a contact list named <Segment name> - DD-MM-YYYY (today's date). You'll find it in CRM > List.
4. Auto-update it with a Template Trigger
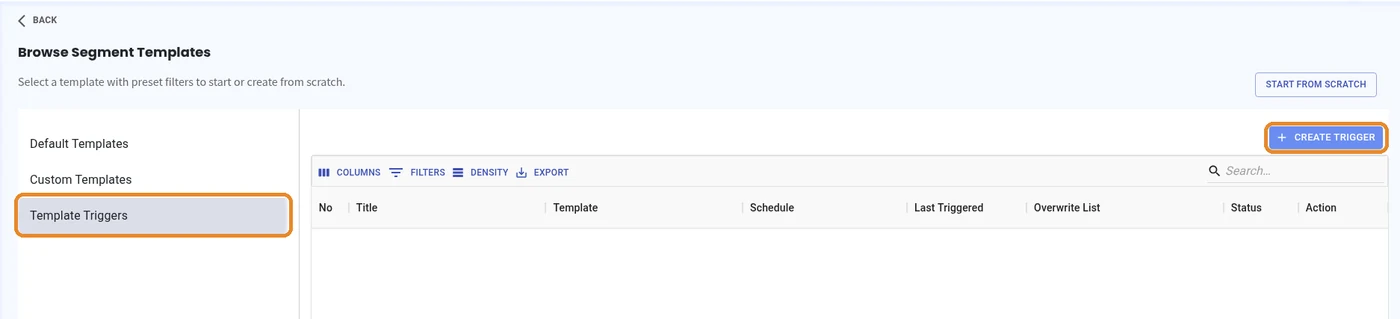
Go to CRM > List > SEGMENT and click Template Triggers on the left.
Click CREATE TRIGGER.
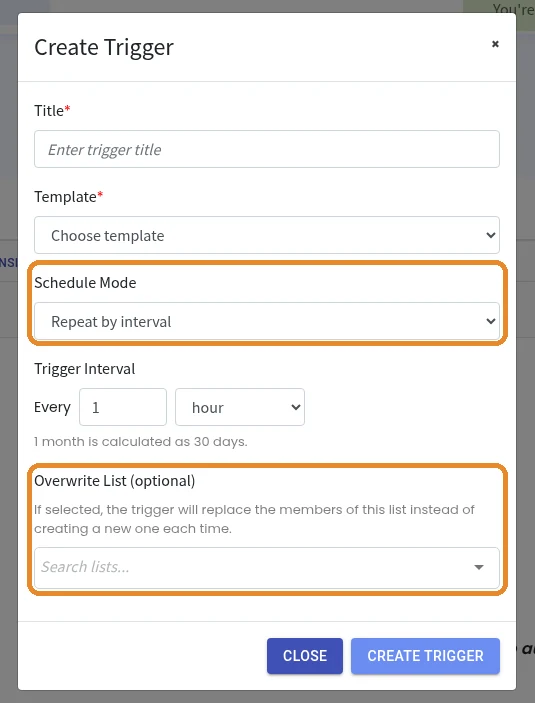
Enter a Title (required), for example "Monthly birthday list".
Under Template (required), pick your custom template. Only custom templates appear here.
Choose the Schedule Mode: Repeat by interval runs every N hours, days or months (1 month is counted as 30 days), and Monthly date and time runs on a set day and time each month (the default is day 1 at 09:00). For birthdays, use Monthly date and time.
Optional: under Overwrite List, pick a list. The trigger then clears and rebuilds that same list on each run, so contacts who no longer match drop out. If you leave it empty, each run creates a fresh, separate list.
Click CREATE TRIGGER. New triggers are switched on straight away. Use the toggle in the Status column to switch a trigger on or off. Each one appears in the table with its Schedule, Last Triggered, Overwrite List and Status.
5. Start a flow from the segment
In the sidebar, open Flows and click Create Flow. The builder opens straight away.
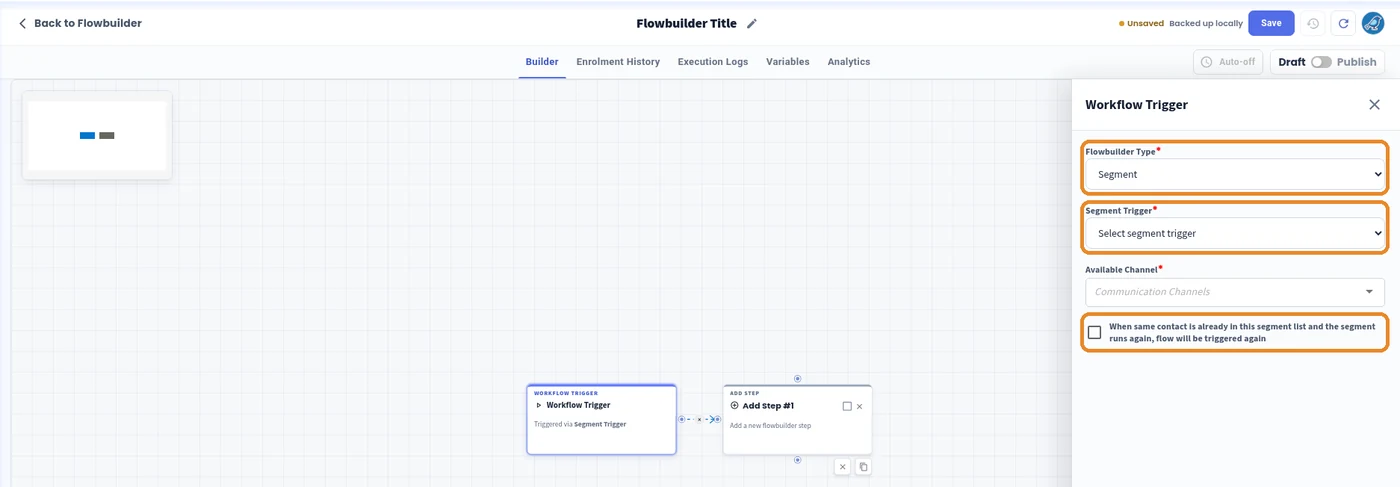
Click the Workflow Trigger box. Set Flowbuilder Type to Segment.
Under Segment Trigger, pick the trigger you created in step 4.
Under Available Channel, pick the channel to send from (for example your WA API channel).
Optional: tick When same contact is already in this segment list and the segment runs again, flow will be triggered again (the re-trigger checkbox) if you want the flow to run for every matching contact on every scheduled run. Leave it unticked to run the flow only for contacts newly added to the list; contacts already enrolled are skipped.

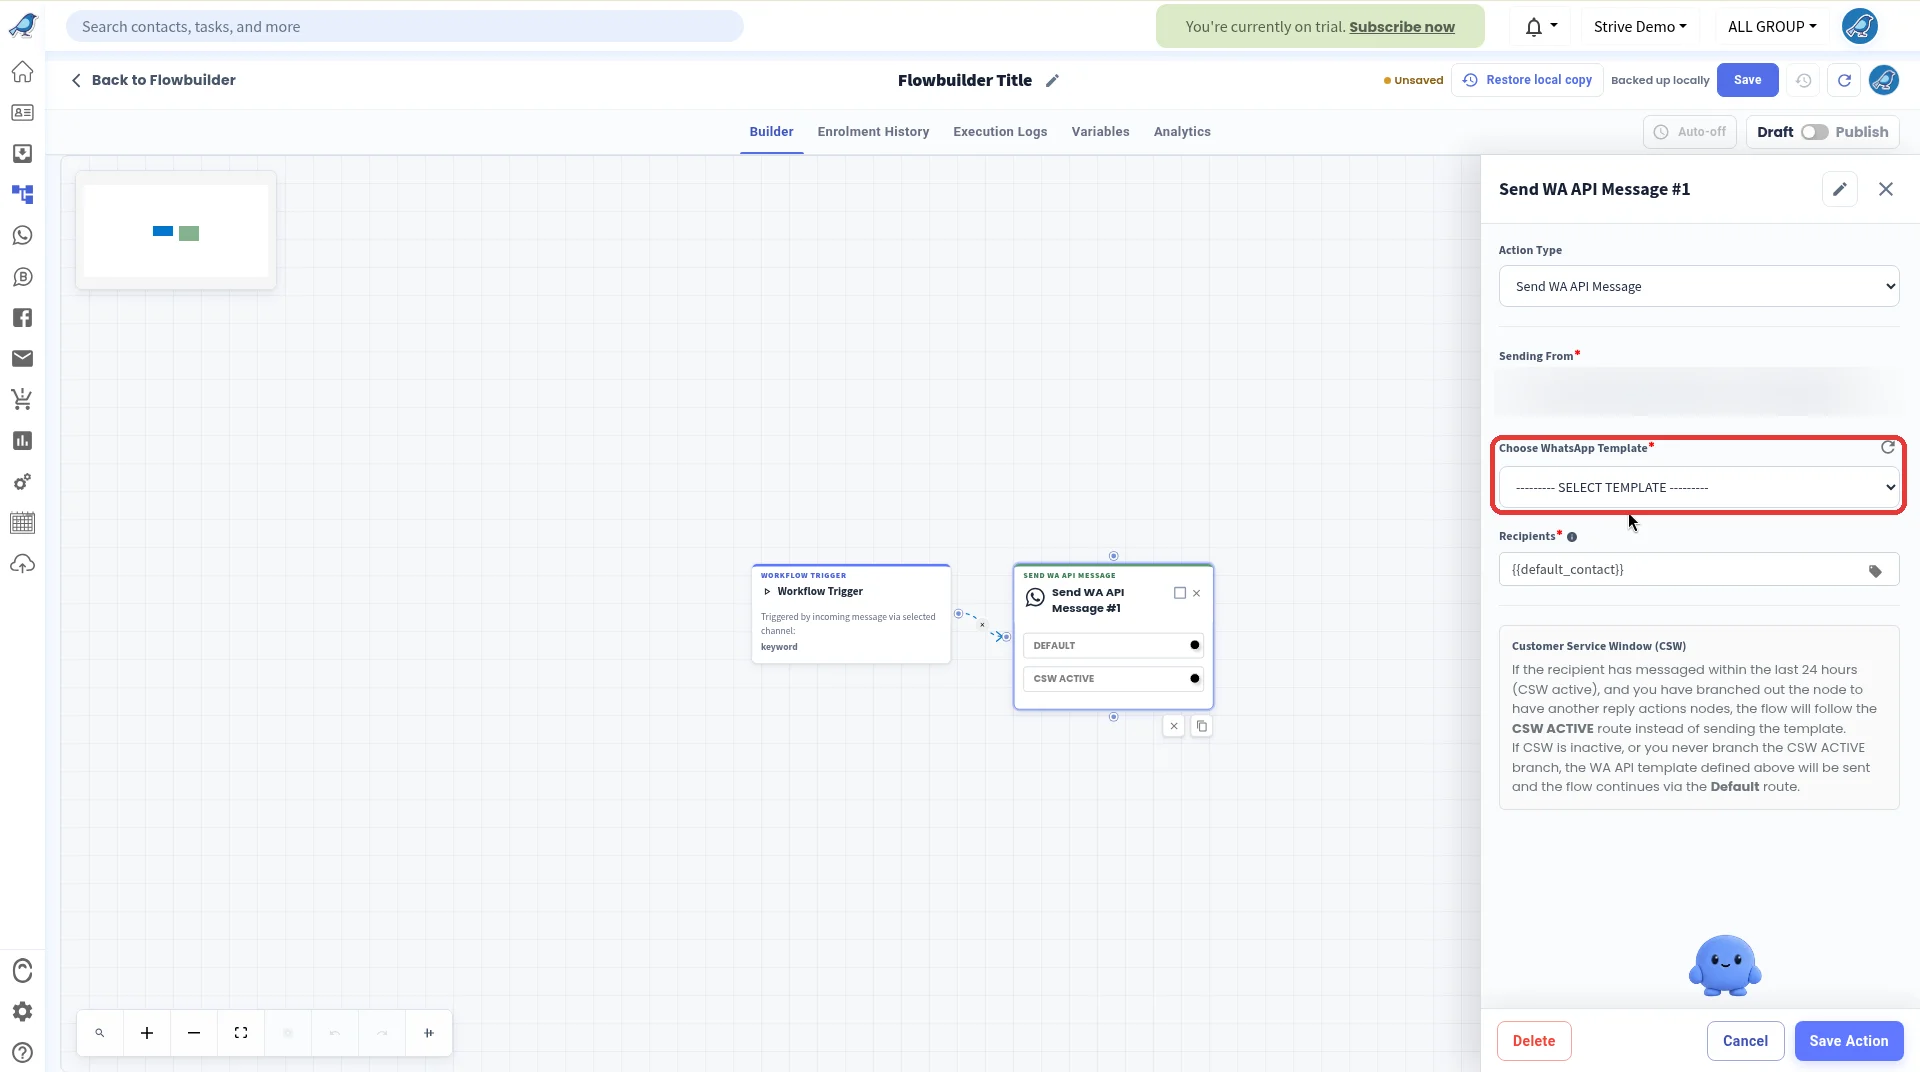
Click Add step, then search for or scroll to Send WA API Message.
Pick the sending number (use the channel where the template was approved), then under Choose WhatsApp Template pick your approved template and its language.
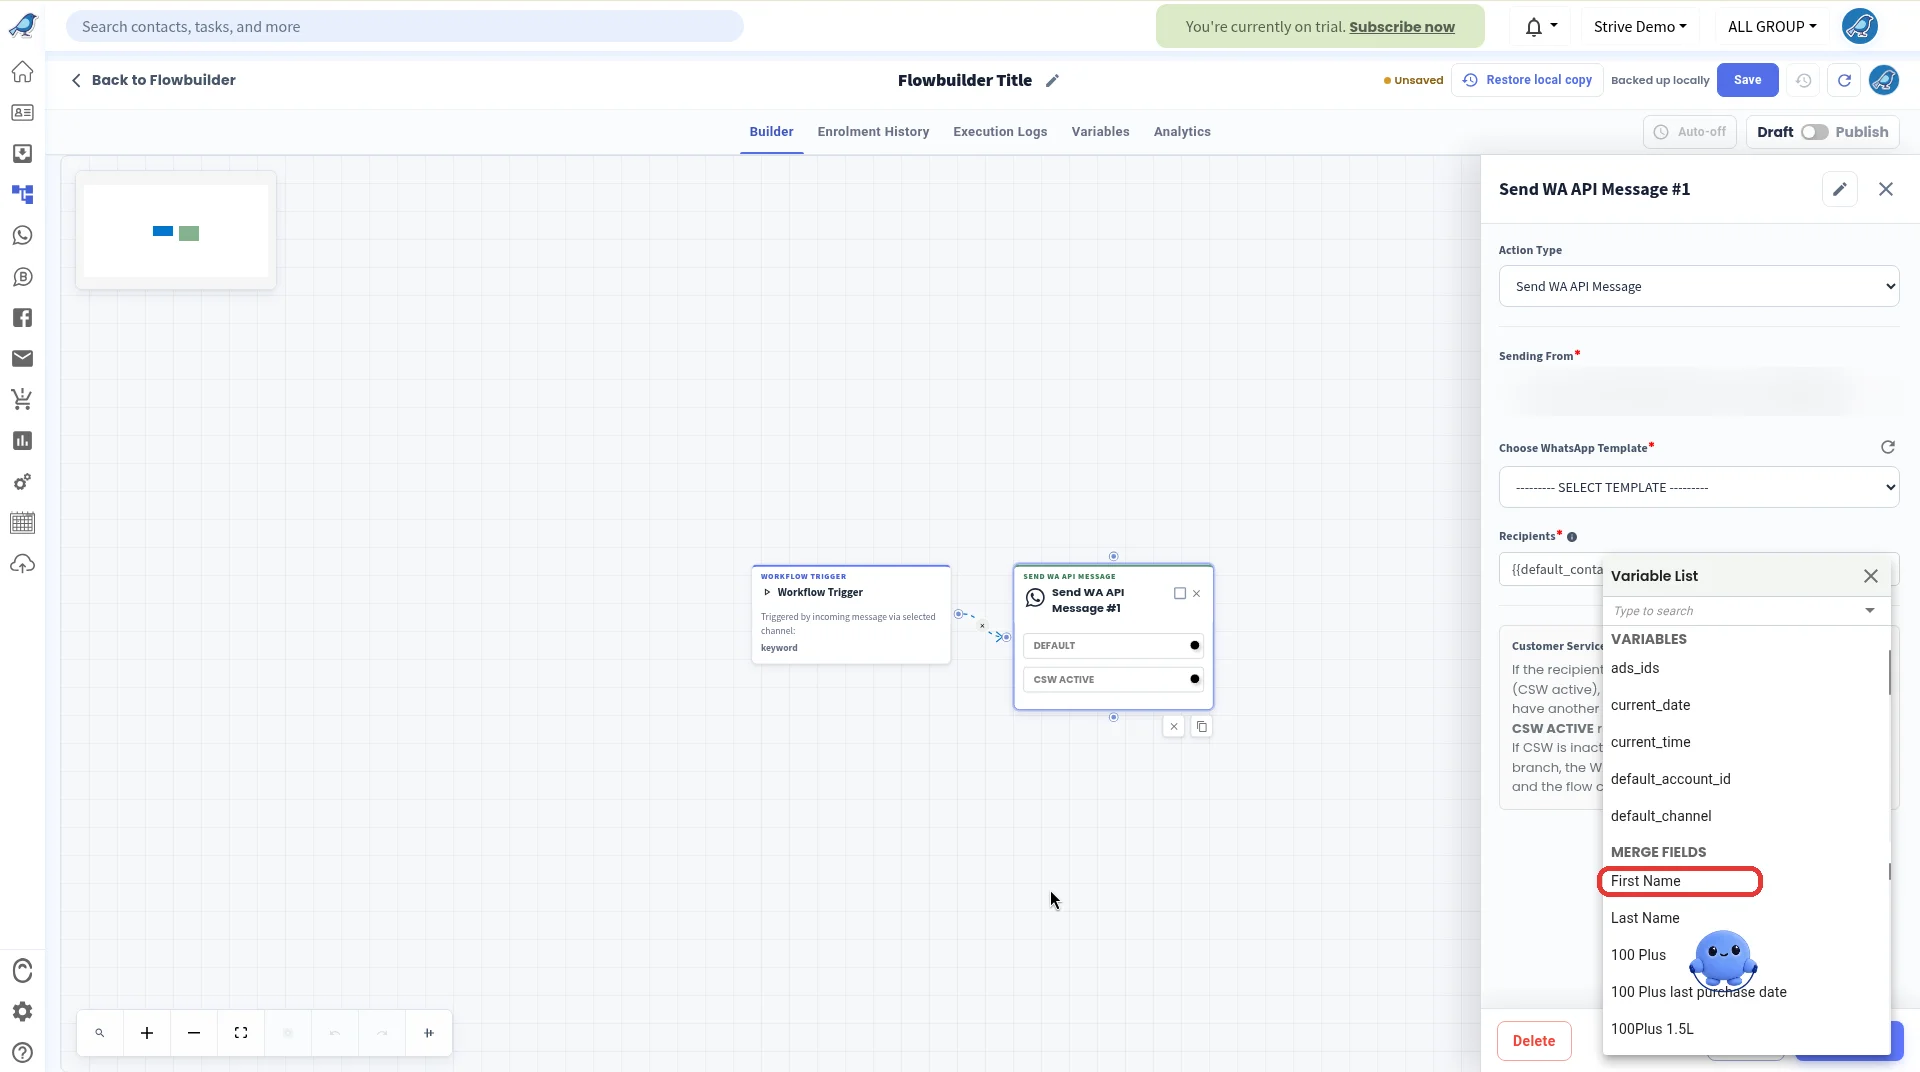
If the template has variables, click the tag icon and pick a value from the Variable List, for example First Name under Merge Fields.
Click Save Action.
Click the pencil next to Flowbuilder Title to give the flow a name.
Click Save (the builder also backs up your work automatically).
Switch Draft to Publish at the top right to turn the flow on.

Good to know
With Overwrite List on, the same list is cleared and rebuilt on every run, so contacts who no longer match drop out and new matches are added.
With Overwrite List off, each run creates a fresh, separate dated list. Use Overwrite List if you don't want many lists to build up.
By default, the Segment flow runs only for contacts newly added to the list; contacts already enrolled are skipped. Tick the re-trigger checkbox to run it for every matching contact on every scheduled run.
To stop the automation, switch the trigger off with the toggle in the Status column of Template Triggers, or set the flow back to Draft.
Related
How to Track Ad Lead Conversions in Strive (see which ad leads converted, then follow up with a segment)
How to Set Up Lifecycle and Filter Contacts by Lifecycle (to filter by Lifecycle stage, which segments don't cover)