How to Track Ad Lead Conversions in Strive
Go to Report > Conversion (strive.asia/conversion). Leads tab: filter by date, Channel and Ad, then use the status pills All / Untouched (no one has replied yet) / In conversation / Converted (a product purchase is recorded for the contact) / Not attributed (not matched to any ad source you've added); Export downloads the leads. Performance tab: Leads, Replied to, Converted and Revenue (total value of products purchased by attributed leads in the date range), with Break down by Ad, Channel, Conversion type, Product, Recorded by or Flow. Ad sources tab: give each ad a clear name and a Source ID (the ad's ID from the ad platform, e.g. the Ad ID in Meta Ads Manager) with Add ad source (Create Conversion Identity), then click Save; past and new leads from that ad are matched. Works with Click-to-Chat ads on WhatsApp API, WhatsApp Personal, Facebook Messenger, Instagram Direct and TikTok. Needs the Report permission. This is separate from the Lifecycle report's Conversion rate, which counts journeys that reach Won.
The Conversions page shows every lead that came in from your ads in one place: who has not been answered yet, who is in conversation, who has converted, and how much revenue your ads brought in. You find it under Report > Conversion.
Before you start
Conversion tracking works with Click-to-Chat ads that bring leads into a channel connected to Strive: WhatsApp API, WhatsApp Personal, Facebook Messenger, Instagram Direct or TikTok.
You need the Report permission in Setting > Roles to open this page.
Conversion here means ad leads. It is not the same as the Conversion rate in the Lifecycle report (see the last section).
1. Open the Conversions page
In the Strive sidebar, go to Report > Conversion. You can also go straight to strive.asia/conversion.
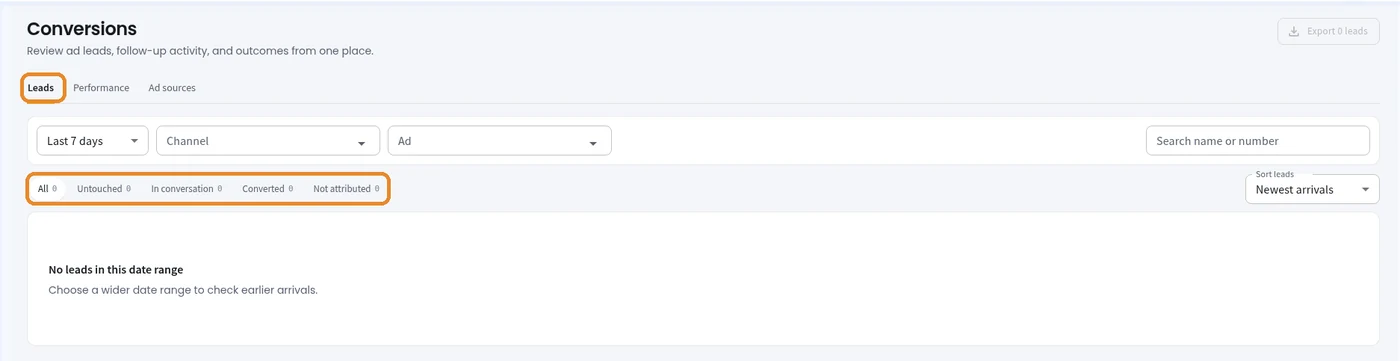
The page is titled Conversions, with three tabs: Leads, Performance and Ad sources.
2. Review your ad leads (Leads tab)
Pick a date range (for example Last 7 days). If you see No leads in this date range, choose a wider range.
Narrow the list with Channel and Ad, or type in Search name or number.
Click a status pill to filter the leads: All, Untouched (the lead came in from an ad, but nobody has replied or chatted with them yet, and they haven't converted), In conversation, Converted or Not attributed (the lead couldn't be matched to any ad source you've added, for example no ad attached or an unknown ad). The number on each pill is the count for that status.
Use Sort leads to change the order (for example Newest arrivals).
Click Export at the top right to download the leads in the current view.
How a lead becomes Converted
A lead is marked Converted when a product purchase is recorded for that contact, in the contact's details in CRM. Moving a deal to another stage or running a flow step does not mark a lead as converted.
3. Check performance (Performance tab)
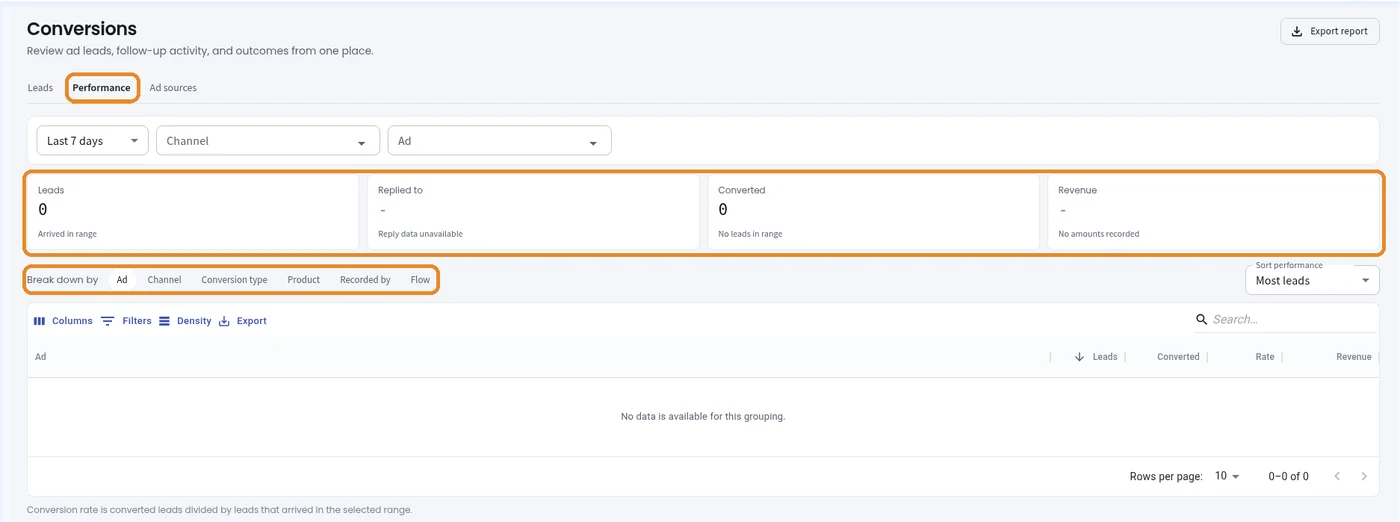
Click the Performance tab. The same date, Channel and Ad filters apply.
The cards at the top show Leads (arrived in the range), Replied to, Converted and Revenue.
Under Break down by, pick Ad, Channel, Conversion type, Product, Recorded by or Flow to see Leads, Converted, Rate and Revenue for each one.
Rate is converted leads divided by the leads that arrived in the selected range.
Use Columns, Filters, Density, Export or Export report to adjust or download the table.
Revenue is the total value of products purchased by the attributed leads within the selected date range.
4. Set up your ad sources (Ad sources tab)
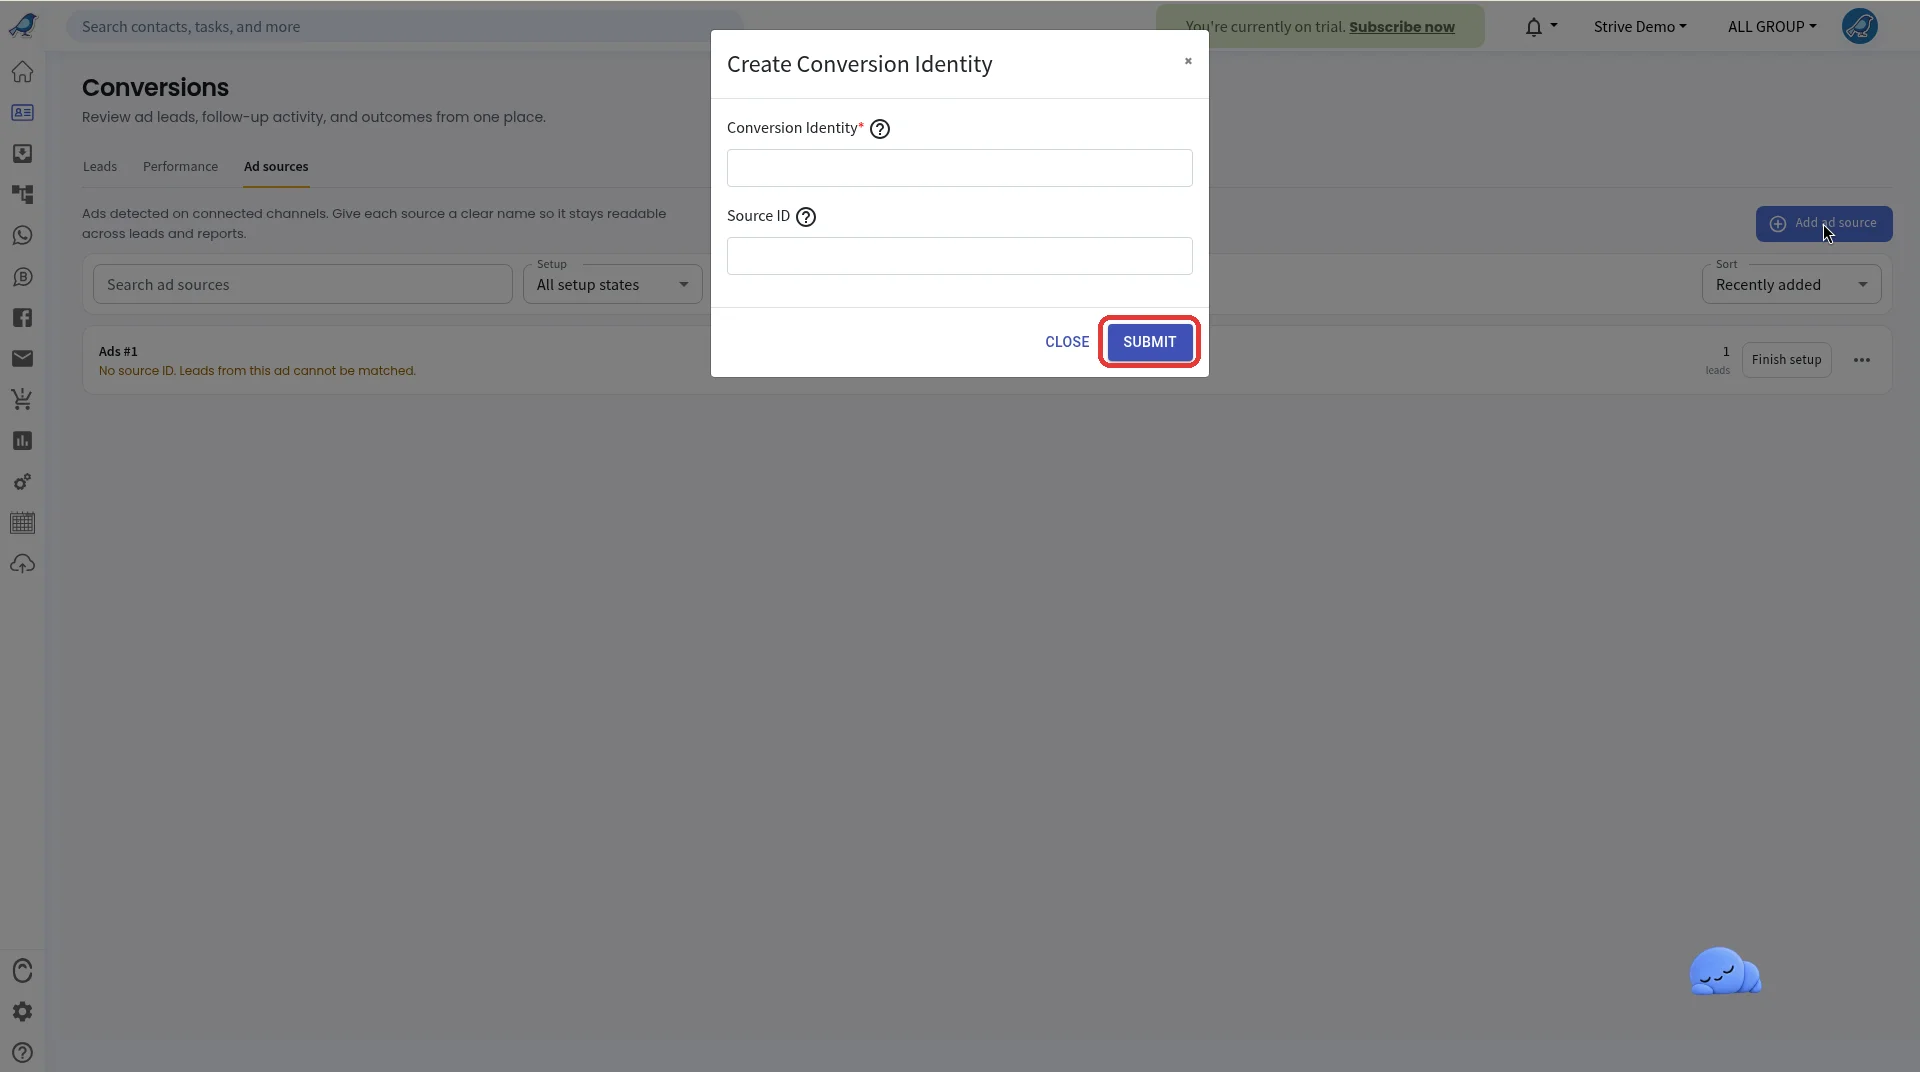
Strive lists the ads it has detected on your connected channels. Give each one a clear name so it is easy to read across leads and reports, and add its Source ID so leads can be matched to it.
Click the Ad sources tab. Use Search ad sources, the Setup filter (for example All setup states) and Sort to find an ad.
If an ad shows No source ID. Leads from this ad cannot be matched., click Finish setup next to it.
To add a new one, click Add ad source. The Create Conversion Identity window opens.
Fill in Conversion Identity (required, the clear name you want to see in reports) and Source ID. The Source ID is the ad's unique ID from the ad platform, for example the Ad ID in Meta Ads Manager.
Click SUBMIT. Leads from that ad, including past ones, are now matched to it.

Conversion vs. the Lifecycle Conversion rate
Report > Lifecycle also shows a Conversion rate. That number counts contact journeys that reach the Won lifecycle stage. It is separate from the ad-lead conversions on this page. See How to Set Up Lifecycle and Filter Contacts by Lifecycle.
Good to know
Leads with no matching ad source show as Not attributed. Finish the setup of the ad source so its leads are matched.
If the page is empty, widen the date range first.
Adding a Source ID also matches existing past leads from that ad, not just new ones.
If you don't see Report > Conversion in your sidebar, contact support.
Related
How to Create a Segment and Auto-Update It with a Template Trigger (target buyers again, for example with a Purchased product condition)