Webhook Flow: Shopify New Order > Send WA API Message
Create a Webhook flow, choose your WA API channel, Publish, then create an Order creation webhook in Shopify and send a test. Refresh variables in Strive, map First Name to default_name and Primary Phone to default_contact, add Send WA API Message with an approved template, and map variables. Use a separate webhook and flow for each Shopify event. Keep the URL and key private.
When a customer places an order in Shopify, you can send them a WhatsApp template from Strive using a webhook flow and a Send WA API Message step. You need a connected WA API channel and an approved WhatsApp template. For the WA Personal version of this guide, see Webhook Flow: Shopify New Order > Send WA Personal Message.
Before you start
A connected WA API channel in Strive, and an approved template. See How to Apply WA API Template and WA API Template Approval.
Access to Flow in Strive, and to Settings > Notifications > Webhooks in your Shopify admin.
1. Create a webhook flow
Go to Flow and click Create Flow.
Set Flowbuilder Type to Webhook.
Under Available Channel, pick your WA API channel.
2. Copy the webhook URL and key
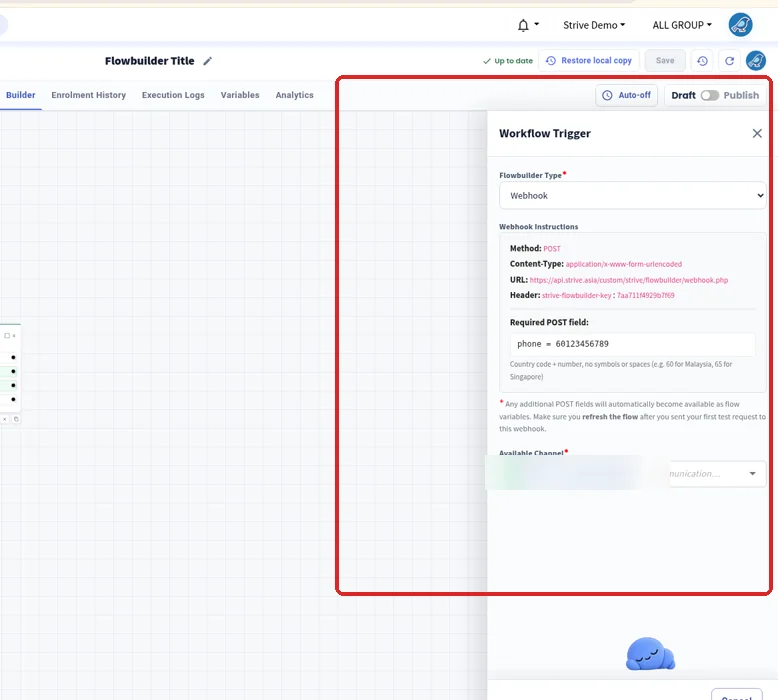
Open the Workflow Trigger panel.
Copy the URL and the strive-flowbuilder-key header value. Keep them private.
The webhook needs a POST field named phone (country code + number, no spaces — for example 60123456789).
Any other POST fields become flow variables after you refresh the flow. The note in the panel says to refresh after your first test request.
Click Save, then switch the flow from Draft to Publish. The key only works after the flow is published.
3. Create the Shopify webhook and send a test
In Shopify admin, go to Settings > Notifications > Webhooks > Create webhook. See also How to Create a Webhook in Shopify.
Set Event to Order creation, Format to JSON, paste the Strive webhook URL, then Save.
Open the webhook and click Send test notification. A successful response means Strive received it.
If you get an error about an invalid or inactive flow key, check that the Strive flow is Published, then send the test again.
4. Refresh variables and map the contact
Back in Strive, open the flow and click the circular refresh icon in the top bar (there is no separate Test button). This loads variables from the webhook payload.
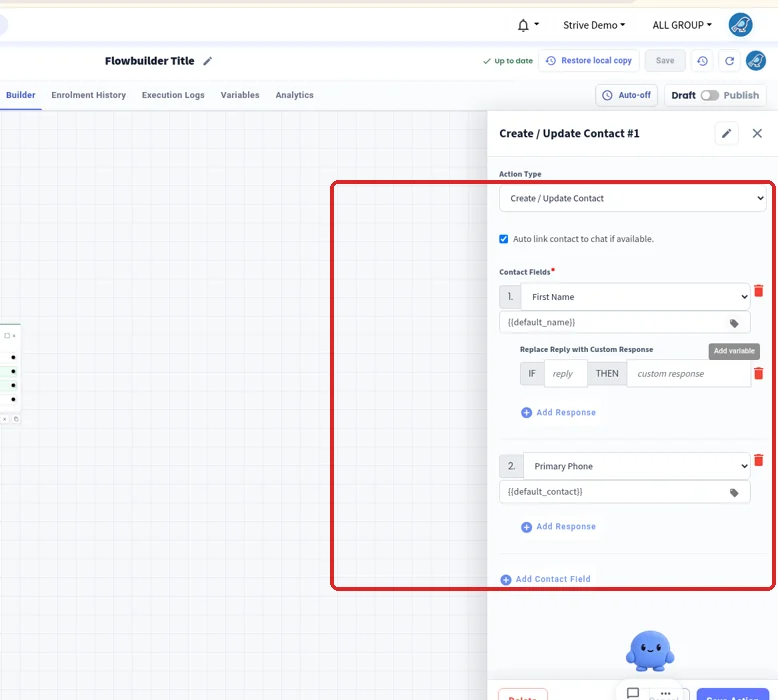
Add a Create / Update Contact step.
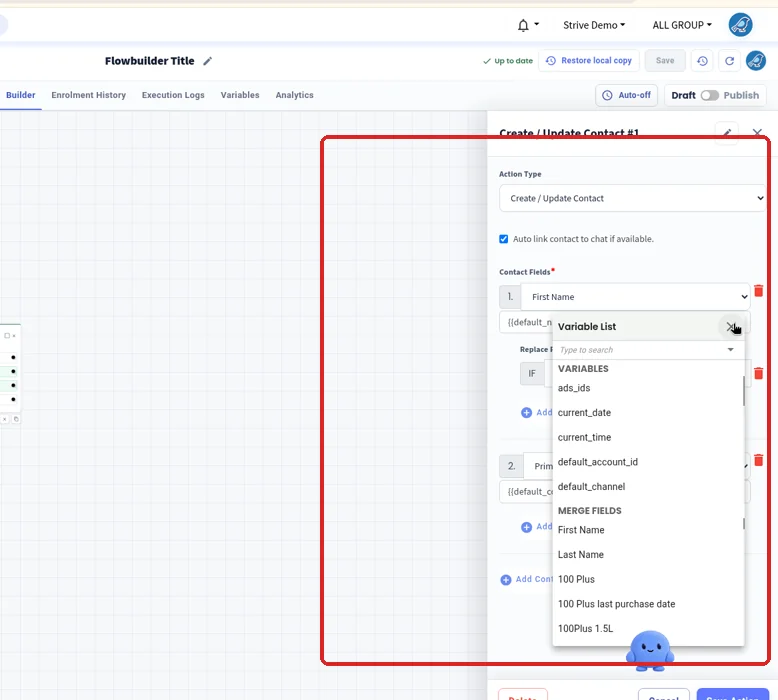
Click Add Contact Field, choose First Name, click the tag icon, and pick default_name.
Add Primary Phone and map it to default_contact (country code + number, no spaces).
After your first real Shopify test, you can switch these mappings to the Shopify fields that hold the customer name and phone, if they appear in the Variable List.
Click Save Action.
5. Send a WA API message
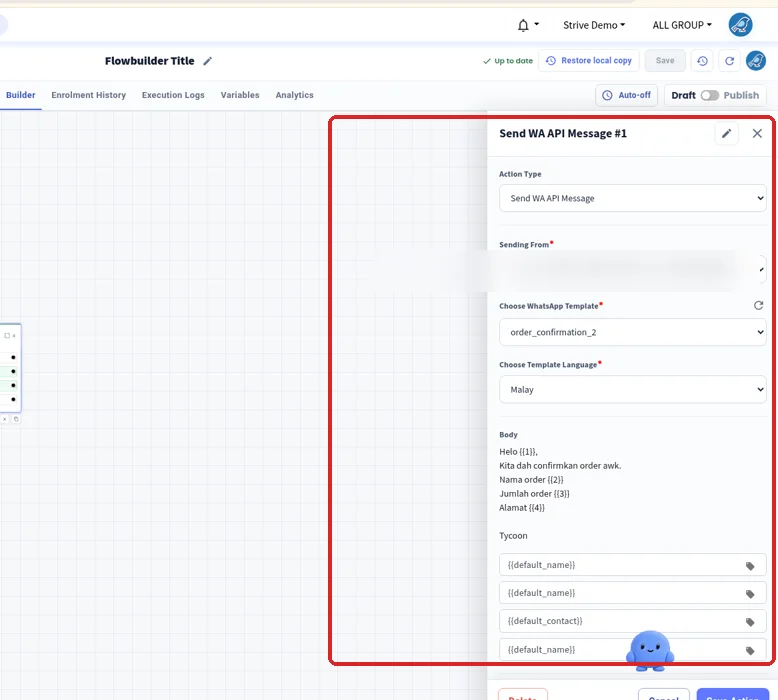
Add a Send WA API Message step.
Under Sending From, pick your WA API channel.
Set Recipients to default_contact (or the phone field you mapped).
Under Choose WhatsApp Template, pick an approved template and its language. Use the small refresh icon next to the template list if a new template does not appear yet. Any approved template works.
If the template has variables, click the Insert text or merge field tag icon on each field and pick a value from the Variable List (for example default_name, or a Shopify order field after refresh). Same idea as in How to Create a Segment and Auto-Update It with a Template Trigger.
Click Save Action, then Save the flow and keep it Published.
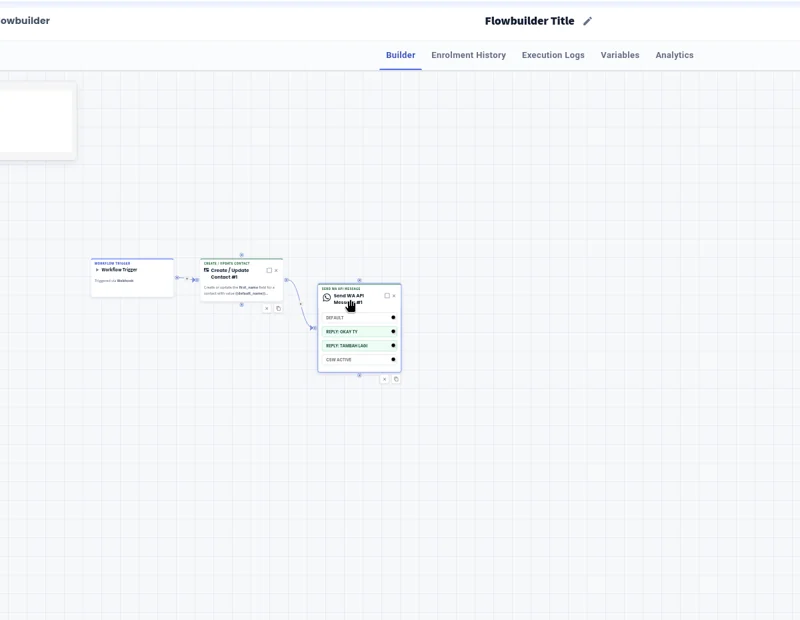
Optional: turn on Branch template quick replies so the flow can branch by which quick-reply button the customer taps (shown as REPLY outputs on the node). DEFAULT continues otherwise. A CSW ACTIVE output also appears on the node.
Common questions
Do I need an approved template? Yes. Without one, Send WA API Message cannot send. See Understanding WA API Templates Message.
The Shopify test failed with an invalid key. Publish the Strive flow first, then send the test notification again, then refresh variables.
Can I also send for order updates? Use a separate Shopify webhook and a separate Strive flow for each event (for example Order creation vs Order updated). Shopify's webhook body is the order itself — it can include status fields such as financial_status or fulfillment_status, but it does not include a field that says which event fired. So you can't reliably tell Order creation from Order updated from the body alone. Keeping one event per flow stops customers getting the same message on every order change. Inside one event's flow, you can still add a Condition on a status variable (for example only continue when financial_status is paid) if that field appears after you refresh webhook variables.